


DIY stair makeover: basement edition

When we remodeled our stairs in late 2013, we hired professionals to do all the important, tricky stuff – like opening up the wall and installing a new header, and ripping out the old stairs and installing new stringers – but we asked them to install temporary treads and risers on both staircases. At the time, we were still trying to decide between continuing the hardwood we installed upstairs onto the main floor or doing something entirely different (spoiler alert: we did something different). And hey, we're always up for a new DIY challenge.
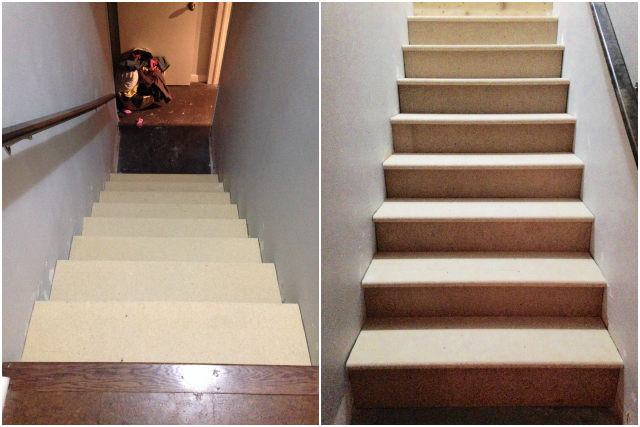
In the spring of 2014, we installed permanent treads and risers leading upstairs, which we painted and stained ourselves. But the basement steps? Well, as of this weekend, they still looked like this:

I know. These pictures make me cringe, but if I'm being honest, we stopped noticing the stairs after awhile (kind of like that pile of dirty laundry). They were disgusting, but functional.
Over the weekend, we FINALLY bought permanent treads and risers, and I installed them while Adam found various ways to distract Hannah. I'm no expert, but since the treads and risers I installed upstairs still look great two years later, I can at least offer some insight into what's worked for me.

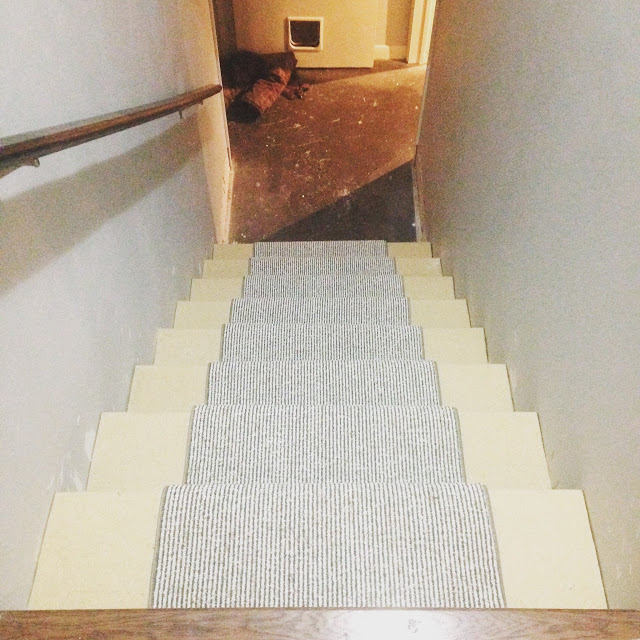
I measured each step and cut my tread and riser to be a half inch longer than the opening. Then I angled the tread or riser in place so that it was flush against one wall, and marked the tread or riser by dragging my scribe against the wall (you can see a picture of my “scribe” in this post). This allowed me to trim an additional 1/4-inch off each side of the tread or riser, at an angle that exactly matched the wall. The last step is to screw the step into the stringers (riser first, then tread). You can see how I was working my way down the staircase in the picture above, and the finished product below.
Last time I painted and stained my treads and risers before I installed them, but since we're planning to paint these steps and install a runner, I wanted to purchase the runner first.
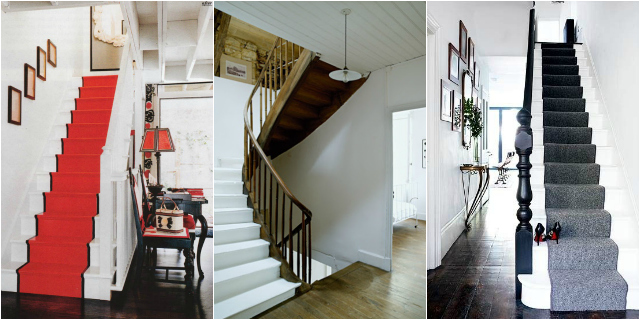
I found these simple striped runners at JYSK for only $9.99 a piece. I shared this picture on Instagram and asked for paint colour suggestions, but after reviewing the stairs I've pinned over the years, I noticed a definite trend:
I've started painting and caulking the stairs, and I'm excited to tackle the runner. Patching and painting the walls, adding new baseboards at the bottom of the stairs, and re-painting the floor are also on my to-do list. Let's see if I can get it all done this week!
Read more at House Pretty
Source: http://house-pretty.blogspot.com/2016/01/diy-stairs-makeover-basement-edition.html
