


Main Bath Progress
Wednesday, September 21, 2016 3:49
% of readers think this story is Fact. Add your two cents.

 |
| spotted here |
In my last post on our main bath, I shared my plans for a phase one update. The quote for the flooring came back higher than expected, so I decided to move on to something else and ordered black and white peel-and-stick tiles. I wanted to try something like this, but while I was waiting for my tiles to arrive, this picture showed up in my Pinterest feed. It not only inspired me to lay the flooring in a diamond pattern, it inspired me to update our boring, hollow core door (more on that later).
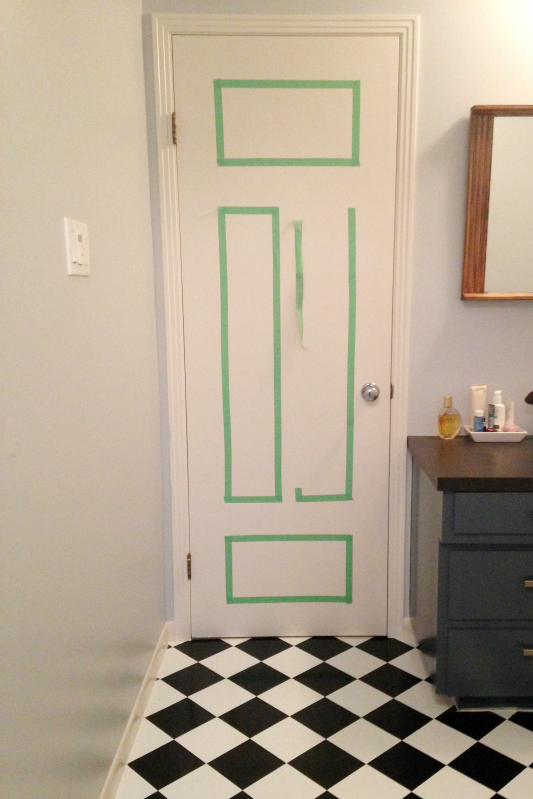

The picture above is a big hint at what I'm planning (I ran out of painter's tape, ha!). I took some progress photos with my phone, figuring that an update with crappy photos is better than no update at all.
Given's the room's layout, I thought the most important view would be the one from the door. According to most of the tutorials I read online, you're supposed to find the center of the room and start from there, but I started the point of my first diamond at the center of the back wall, planning to work my way out of the room. With my first tile in place, I stuck the rest of them down and tried my best to keep the tiles lined up as I went (the tiles I bought came pre-printed with four black and white squares on each tile, so they didn't always line up perfectly, even with the arrows on the bottom pointed in the same direction). I should also note that I stuck the tiles directly to the existing linoleum flooring, which I'm pretty sure the instructions said NOT to do. Since this is a temporary fix, my thinking was that I could always re-stick any loose tiles with glue, knowing that it wouldn't make it any harder to tear up the floor when we're ready to renovate (as compared to gluing them directly to the subfloor).
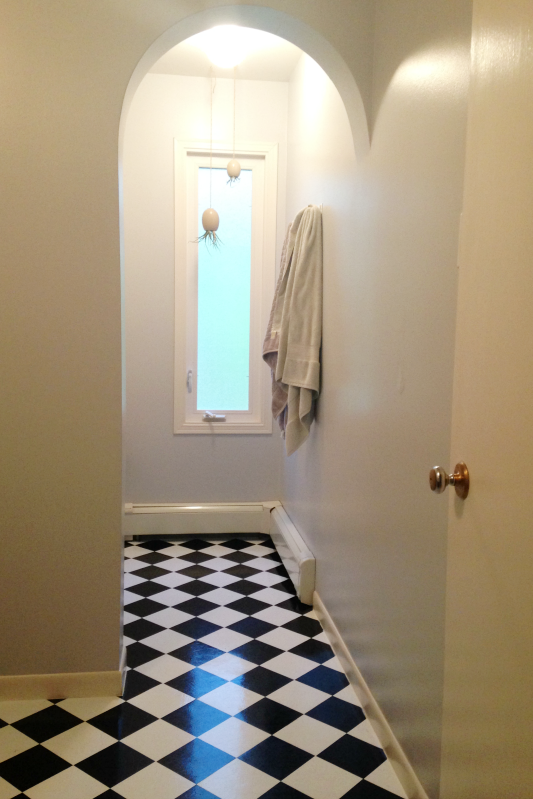

The diamond pattern made the process a little more complicated (more cuts overall and I had to pay attention to lining up the pattern), but the tiles cut easily with a sharp utility knife, and I got pretty good at making paper templates to ensure my cut tiles were a tight fit. I opted not to remove the baseboards for installation and I worked around the toilet, too. I was able to fit the tiles pretty closely, but I put a bead of caulking around the room and toilet just to seal everything and make it look as clean as possible. The off-white baseboards are driving me crazy in these pictures, so painting them is next on my list.

They may be cheap peel-and-stick tiles, but they look so much better than the old flooring, which you can see in these 'before' and 'after' photos of the vanity I took with my phone:

I still have a few projects to tackle in here, including painting the tub and tile (!!), but the new flooring has made such a difference to the overall look and feel of the room.
Read more at House Pretty
Source: http://house-pretty.blogspot.com/2016/09/main-bath-progress.html
