


| Story Views | |
| Now: | |
| Last Hour: | |
| Last 24 Hours: | |
| Total: | |
Bassanti Silver Edition Creating Digital Wet Plates with Tonality Pro by Macphun
Sunday, October 2, 2016 13:49
% of readers think this story is Fact. Add your two cents.

Joao Carlos Daily Dose
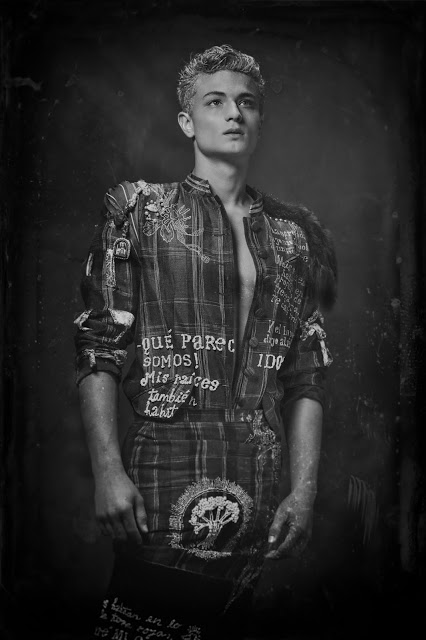
NAKED ON YOUR LAP COUTURE SAUVAGE a WEARABLE ART PROJECT BY Bassanti SILVER EDITION by Joao Carlos Photography yours truly .
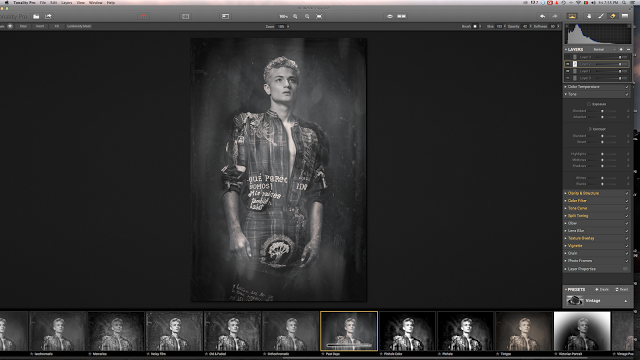
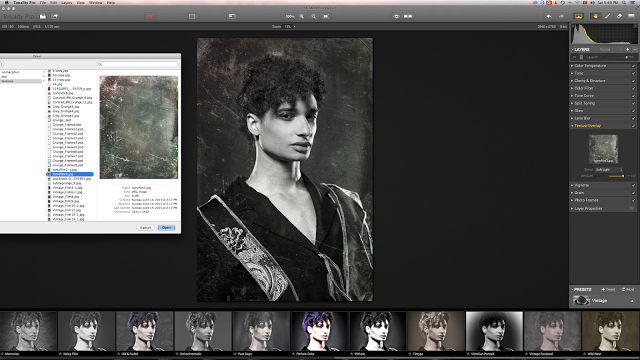
Earlier this month I wrote a behind-the-scenes post that showcased my latest project for Bassanti, however instead of just one project, in realty I created two separate series . The commissioned catalogue shoot showcasing the designers creations in all there wonderfulness , however I felt like it just wasn’t enough , after I shot all 50 looks and made selections of the final images to start the skin editing process , it happen to be about the time Tonality Pro came out with a up dated version (If your not familiar with Tonality Pro you can read more about it here ). In a previous blog post I showed you a ton of examples and gave you my thoughts about the new update , so for this blog post I figured I would just show you how I create digital wet plates with Tonality PRO by Macphun
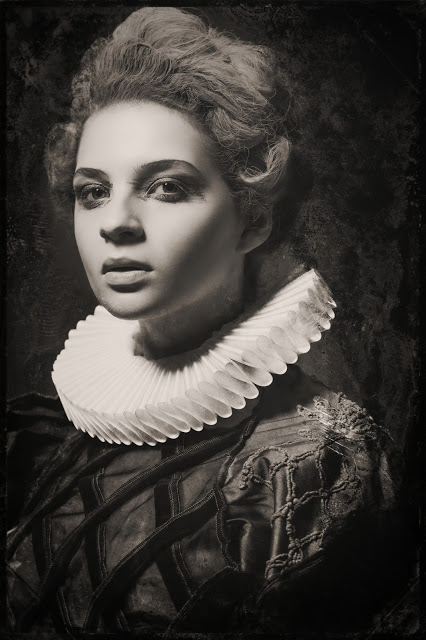 |
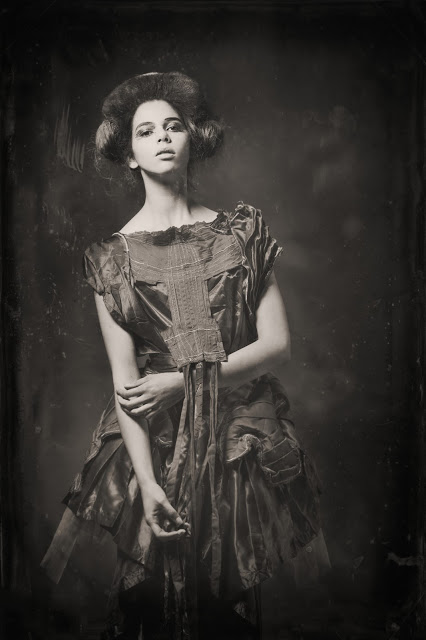
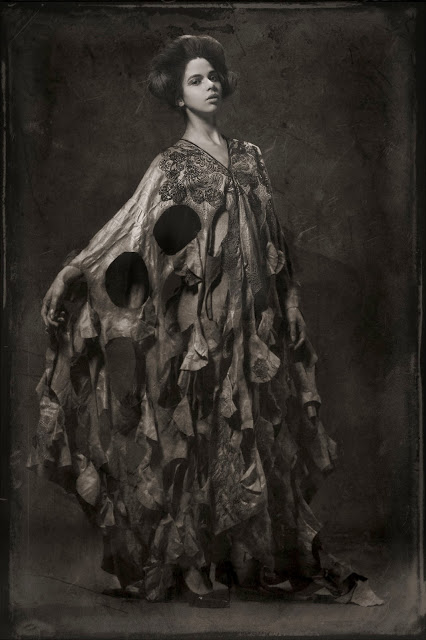
| This was the image I used for the Cover of the Box that holds the silver edition in . |
I also used a number of their apps from the cool folks over at Macphun , such as Snapheel to edit skin and textures . I also use Focus 2 to create a shallow depth of field to really get that Wet plate effect, along with a little extra vignette it really helped create the effect I wanted .By mixing different effects, layers and textures I am able to create a series of images that are not only cool and interesting but also unique , I had allot of fun experimenting at the beginning stages so much that I kept creating more and more images. In the end I have 50 solid, creative, unique images. To finalize my images I also ran some of them through Noiseless Pro .
Let me just mention that Macphun is currently running a Creative Kit Summer Sale —it already started last week so I am hoping its still available ,, the current Creative Kit will have a brand new version of Noiseless Pro included. So, let’s see what’s inside this new update and remember
Let me just mention that Macphun is currently running a Creative Kit Summer Sale —it already started last week so I am hoping its still available ,, the current Creative Kit will have a brand new version of Noiseless Pro included. So, let’s see what’s inside this new update and remember
USE PROMO CODE JOAOMACPHUN10 AND SAVE 10% ON ALL MACPHUN products .
NOISELESS PRO UPDATE – get an improved Creative Kit at 73% OFF (fir just $99.99) with this new app version inside!
The major news is that Noiseless Pro, which provides a one-click solution for eliminating digital noise, now includes the option of BATCH PROCESSING.
Key Improvements: Noiseless remains the fastest noise reduction software for Mac, with the update bringing a 14% speed increase With Batch Processing, users can process a number of images at once, resizing, renaming and saving files in popular image formats (JPG, TIFF, PNG) Users will have the option to select from automatic noise reduction, use a built-in preset, or even create their own custom preset. Custom batching presets can also be saved so a combination of options chosen previously can be used again.The Light, Moderate and Medium presets have been improved to give even better results with portraits and photos where the noise is minimal.
The new Noiseless Pro is now available for $49.99 as a limited time offer.
The new Noiseless Pro is now available for $49.99 as a limited time offer.
There are a Tons of benefits of purchasing Creative Kit versus only Noiseless Pro in August - for $49.99 you only get one app, and for $99.99 – whole 5 Pro apps from the Kit together!
 |
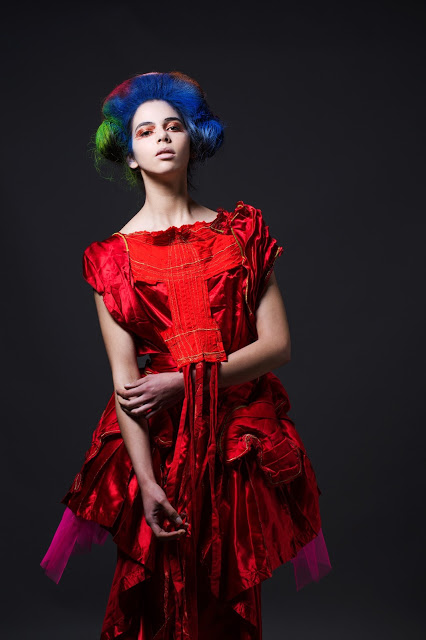
| Original image |
I have made some quick selections to give you a run through on my editing process . If I haven’t answered any questions you may have after this post please feel free to reach out and ask any questions in the comments section .
 |
| step two – I created textured backgrounds that I start very earlier on layering them into the image . |
 |
| I use multiple textures to create old vintage affect . |
 |
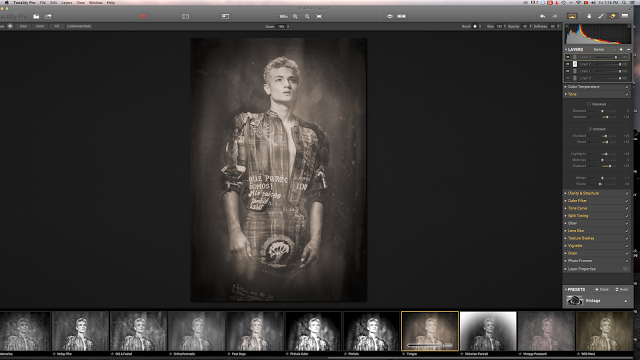
| I now create a second duplicate layer and upload a textured background . You can change the opacity to help integrate your textured layer . |
 |
| There are literally dozens of presets to choose from , added with the capability for customization, your created vision is endless . |
 |
| I add yet another layer and another preset caladium at 50% opacity |
 |
| as I add more layers, I tweak the contrast , shadows and saturation levels on each added layer . |
 |
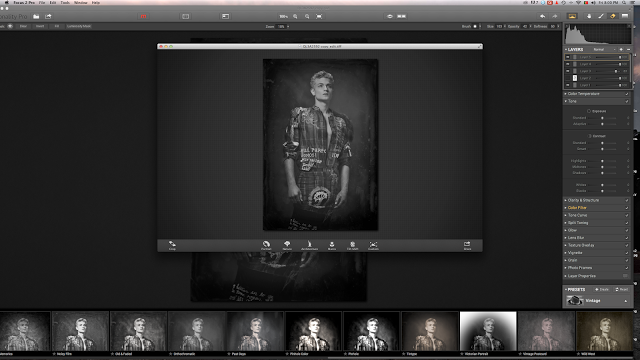
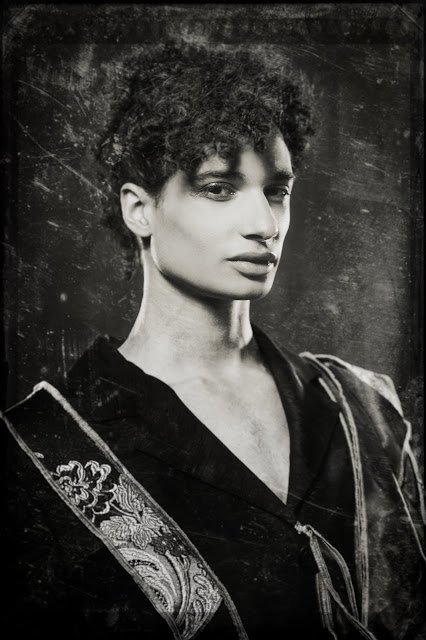
| To finalize the image , I may go to Focus Two Pro , Focus Pro is great at that it allows you total focus control over an image , in this case I made a selection of the models face or body part and only focused there , blurring the unselected part of the image . This, if done properly can emulate large format bellows camera effect or Tilt-shift effect, that is always fun and interesting . |
2nd Image
 |
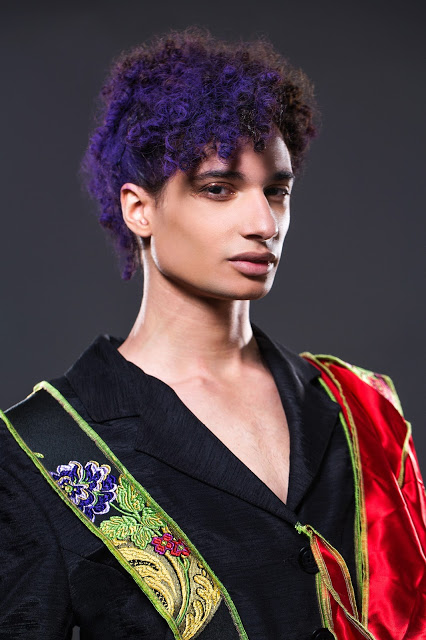
| Original Image |
 |
| Create Layer with vintage preset , adjustments of shadows and contrast . |
 |
| I jumped into the final image , but again the process is the same for this type of digital copy of a wet plate . I use multiple textured layers . Including custom borders . |
 |
| Original Image |
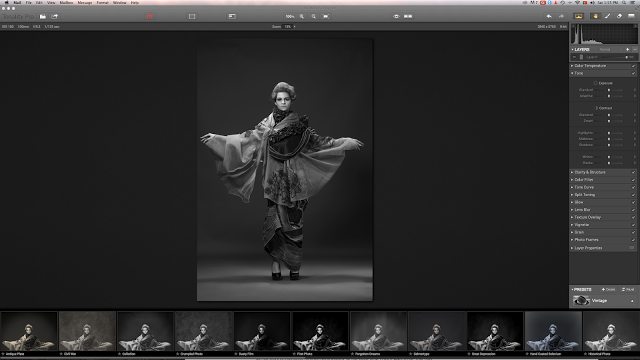 |
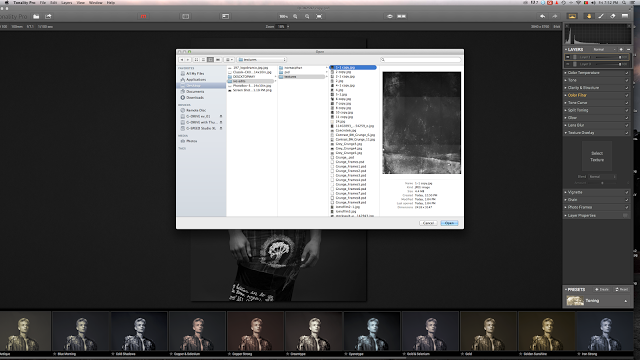
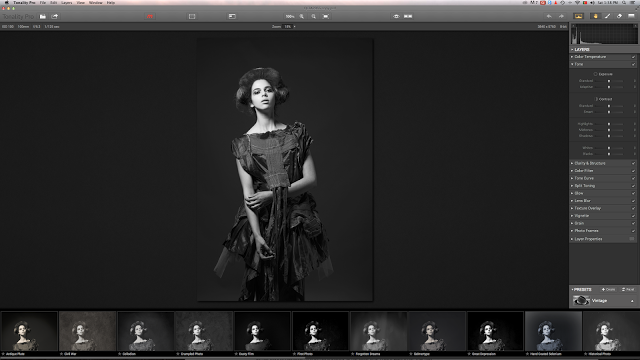
| Step one: Import Image to Tonality Pro and create first layer copy . |
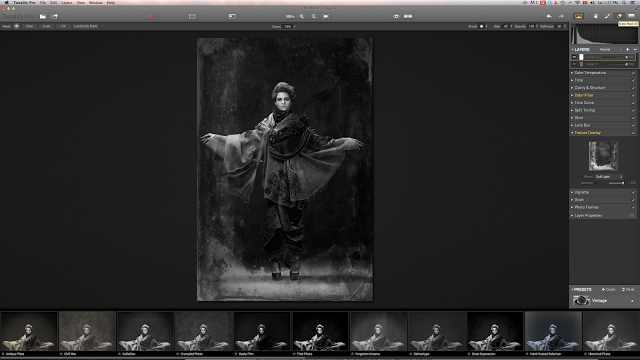 |
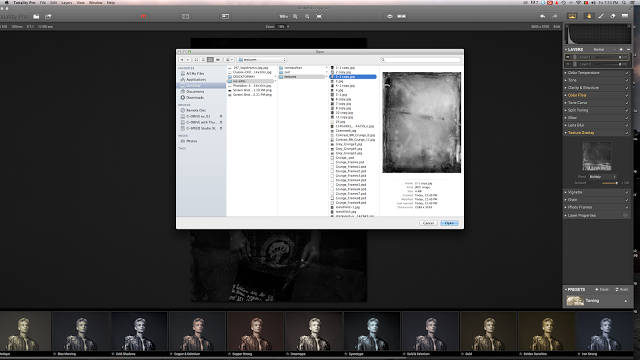
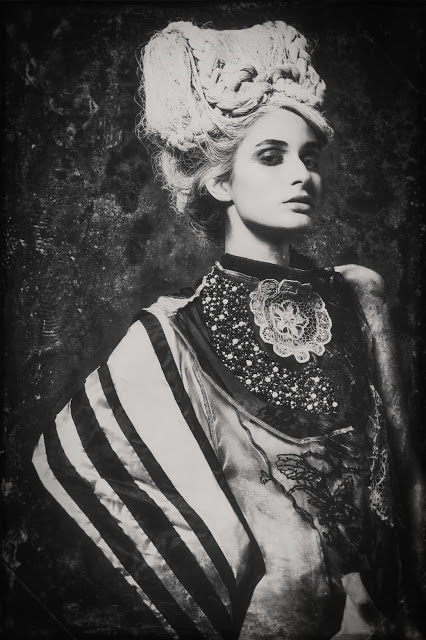
| Step Two: Import textured background, create new layer . |
 |
| Since I was editing 50 plus images I needed to make sure that I never used the same backgrounds and textures more than once . I would sometimes use them repeatedly and then erase certain areas and add more layers , this image above is a good example of by using multiple layers and textures you get a more complex and interesting image . |
 |
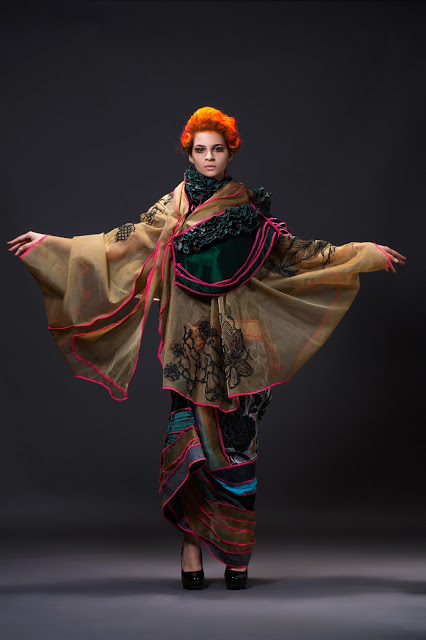
| Original Image |
 |
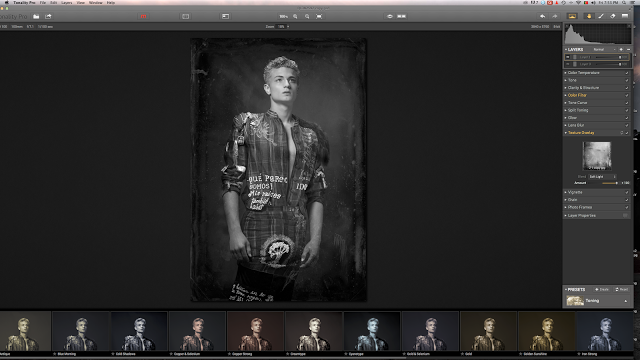
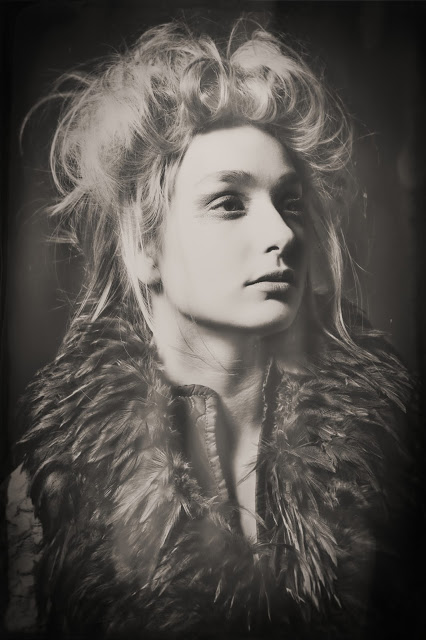
| uploading textured layer . |
 |
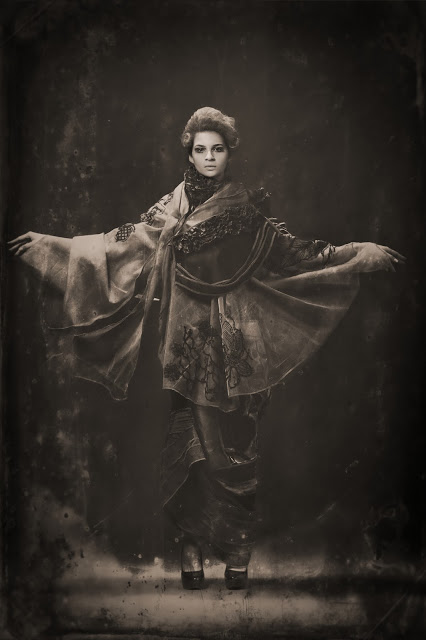
| after some adjustments this image was ready . |
 |
| I must have made four or five copies before I settled on a finale version for this image. |
 |
 |
A project only closes full circle after its printed so in this clip above you get to see the moment when Bassanti receives his hand tailored Silver Edition KOYLAB book . Keep your eyes open for more about that in a future post … until then thank you for reading and please feel free to ask any questions or give any feedback in the comment section below . I will be happy to answer any questions and take in any positive feedback you may have. A big final thanks to my creative team of hair, make up artist , models and my assistants on this project and the amazing Ivo Bassanti that let me be apart of his wonderful creations. I have included at the bottom a little summary for anyone who likes that stuff.
Crew
Photography: Joao Carlos
Make Up: Sara Kruss Taborda
Hair: Elsa Elsart
Photo Assistant: Bárbara Gomes
Digital Assistant & Post Production: Marta Machado
Making of Camera: Pedro Davim
Making of Edition: Rita Karayanni
Models
(DXL)
Ana Rita Luz
Carine Zanata
Christian Pablo
Joana Graça
João Filipe
Mariana Carvalho
Pedro Barros
(Fashion Studio Agency)
Elena Cabac
Filipa Gentil
 |
Buying Software from MacPhun – reduced price
10% off if you use the code: JOAOMACPHUN10
If you buy the software via a link on our site, then we receive a small commission, which helps in the running of the site. We have no commercial connection with MacPhun, and believe strongly that readers should be aware how we run the site.
Summary
Black and white image processing with masking and layers support. Simpler preset options give easy way into using the software Works as a standalone or plugin application.
Summary
Black and white image processing with masking and layers support. Simpler preset options give easy way into using the software Works as a standalone or plugin application.
MSRP: £43.99 (upgrades from Tonality £22.99)
System requirements
Mac OS 10.7 and above
Intel Core 2 Duo, Core i3, Core i5, Core i7, or Xeon processor
4GB RAM and more
- Plug-in for Adobe Photoshop CS5, CS6 or CC; Adobe Photoshop Lightroom 4, 5 or later; Apple Aperture 3.2 or later,
- Photoshop Elements 10 – 12 (App Store version is not supported due to Apple Sandboxing)
Image formats handled
RAW images 8-bit, 16-bit (Including .NEF for Nikon and .CRW2 for Canon)
PSD (Intensify Pro)
TIFF 8-bit, 16-bit ,PNG ,JPEG , Possibility to save progress (.MPI) RGB 8- and 16-bit
Tonality Pro features
Works as a plug-in Adobe Photoshop, Lightroom, Elements and Apple Aperture
Advanced Layers functionality
Blend Modes for layer
Ability to use source color from original image
Higher maximum number of layers: 5 in standard and 8 in Pro
Color Temperature tool
Place Centre for Vignette
Histogram improvements
Show histogram clippings
Zone System (on histogram)
Zoom navigator window
Source: http://joaocarlosphoto.blogspot.com/2015/07/bassanti-silver-edition-creating.html
