
| Visitors Now: | |
| Total Visits: | |
| Total Stories: |

| Story Views | |
| Now: | |
| Last Hour: | |
| Last 24 Hours: | |
| Total: | |
Getting Started Vermicomposting – Raising Worms
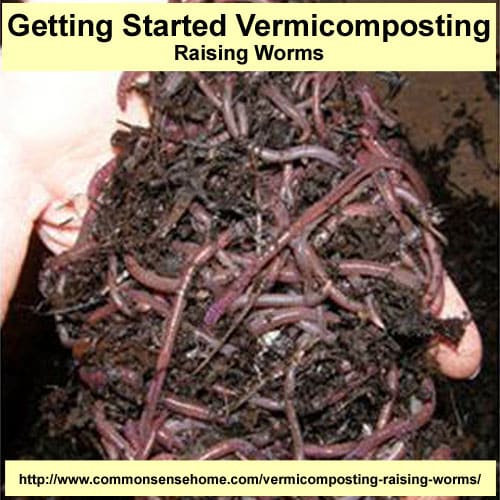
Vermiculture composting (Vermicomposting) is the act of creating rich, organic humus for your garden or lawn by allowing red worms to help in the decomposition process. The resulting castings enrich soil by improving texture, increasing nitrogen, trace minerals, and natural growth hormones from the worms themselves.
In this article I will discuss how to get the absolute most out of small scale, indoor vermicomposting without expensive or complicated equipment. You probably already have most of the tools you’ll need to get started.
Suggested Materials and Tools for Vermicomposting
- shovel
- drill
- 1/4″ drill bit
- drill mounted paint mixer (optional)
- 18 gallon or larger rubber tub
- several 3.5, 5, or 6 gallon buckets with lids, or a few 10 gallon rubber tubs with lids
- Instructions to make castings harvester + tools and materials (1/8 inch screen) http://whatcom.wsu.edu/ag/compost/pdfs/LowCostWormCastingHarvester.pdf
- litmus paper or pH reader
- soil moisture meter (optional)
- water proof thermometer
- worms
- bedding material
- food (mostly waste food from your kitchen)
- agricultural lime (possibly)
- small fan
Vermicomposting Step One: Choose Your Worm
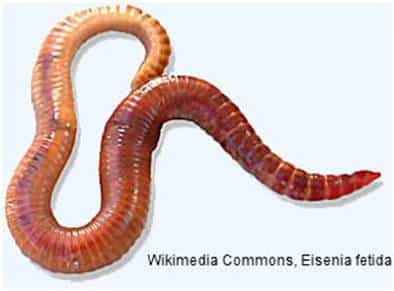
The most popular species for composting are Eisenia fetida, or simply the “red worm” or “red wiggler” although their coloring is considered brown with buff bands. They are often mistaken for and even found with Eisenia andrei whose coloring is more red, but is of about the same size. Both worms perform best at 77ᵒ Fahrenheit and will tolerate temperatures from 32-95ᵒ Fahrenheit, with moisture levels at about 80-85%.
Eudrilus eugeniae (African Night crawler) is my personal favorite for indoor vermicomposting. It is the fastest compost turner and reproducer of all three species. For optimum performance it needs to stay between 60-86ᵒ Fahrenheit, moisture 80%. It can tolerate temperatures down to 40ᵒ or so.
No matter which worm you choose, you’ll want one pound of worms for each square foot of compost/bedding. A 3.5 gallon bucket is about 1 square foot.
Vermicomposting Step Two: Choose Your Bins
“Flow through” bins are popular and there are a multitude of commercial bins and do-it-yourself instructions available. Personally I prefer simpler bins, for a couple of reasons. Flow through bins create conditions where it is easier for anaerobic bacteria to get a foot-hold and proliferate. If anaerobic bacteria take over the bin it will stink and your worms will be sickly if not dead. At this point your bin will have to be cleaned thoroughly, and it can be a real pain, depending on the size and extravagance of the bin.
The secret to happy and healthy worms is simple:
- fresh bedding
- aeration
- correct amount of food
- frequent casting harvests
- thorough, frequent bin cleaning
Although worms do not seem to mind living in close proximity with one another, eventually when kept in the same dirty bin for too long, their castings and other waste materials start to add up. That’s not healthy–no one wants to live in their own waste material. That’s why I advocate frequent casting harvests and bin cleanings.
The Bins I Use
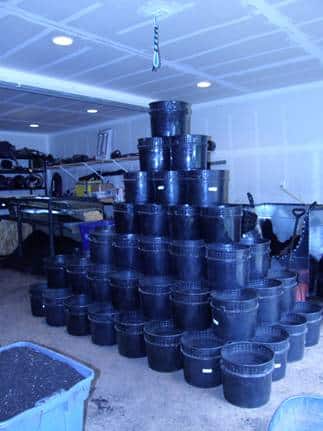
I recommend 3.5 (pictured below), 5 or 6 gallon plastic buckets or at largest, 10 gallon rubber totes. Several small bins are preferable to one large bin because of maneuverability. A 3.5 gallon bucket filled with compost and one pound of worms will weigh between 15 and 20 pounds.
Note the rows of holes below the bin’s rim. Ventilation is very important to your worms so only fill the bin to the bottom row of ventilation holes. I like to use lids on my bins to prevent escapees, making the ventilation holes even more important.
Vermicomposting Step Three: Choose Your Bedding
The best bedding is “fine screened leaf compost” and can be found at your local wood and leaf recyclers. Towards spring they usually run out so in the autumn, I take our truck down and get couple yards, then shovel it onto a tarp outside and cover with more tarps. Tarping is important if you live in a climate with a lot of precipitation.
If you make your own leaf/lawn compost, it should work great as long as the compost is past the thermophilic stage when you use it for your worms.
To make leaf compost go further, mix it about 1:2 or even 1:1 with coconut coir. Coconut coir is sometimes processed in salt water so look for garden grade coir. Coir is a great carbon source, absorbs and retains moisture really well, and helps fluff your compost making the bins lighter and easier to handle.
Other fillers:
- shredded news/office paper (black ink only)
- cardboard
- napkins
- paper towels
- fast food cups
- paper plates
- coffee/coffee filters
- used loose tea/teabags
Make sure these are all chopped or shredded really well as some of them take longer to decompose than leaf litter.
What I Don’t Use For Bedding
- Manure
- because it has to be aged properly to be safe for your worms–fresh manure is too “hot” and will kill the worms
- might contain de-worming medications which will kill your worms
- even after it has aged, it still has an odor and I don’t want that in my basement
- E-coli and other specific bacterial loads are too high which disqualifies the worm castings for organic certification
- castings may retain odor of the manure
- Peat Moss is
- too acidic
- too expensive
- has questionable renewability status
Step Four: Learn The Four Parameters
The four parameters are Moisture, Temperature, Food and pH.
Moisture
- hydrate both your leaf compost and coconut coir to a moisture level of about 80-85%
- squeeze test: squeeze a handful of the compost as hard as you can, it should just begin to want to drip, but not quite
- soil moisture meter, widely available online or at nurseries
Temperature
- bring the compost you intend to use for bedding inside the night before to warm up.
- Use a thermometer to monitor temperature in the bins until you get a feel for what external temperature is ideal for your particular set up. For our set up, the room temperature is kept at about 65ᵒ in the winter and 72ᵒ in the summer.
Food
Recommended Food
- fruit waste; peels, cores leftovers
- vegetable waste; peels, cores, leftovers
- limited grains are not only okay, but good for them for the protein content
Foods Not Recommended
- meat
- dairy
- too many grains
- pet feces
- fresh manure
- dead bodies
- zombies
Mary Appelhof (deceased) writes in her book Worms Eat My Garbage about burying small amounts of leftover meat on the bone with no ill effects.
Chop the food very small, or even puree it in a blender. For each 3 to 4 gallons of compost add about 1-1.5 cups of chopped or blended vegetable/fruit matter, and a couple tablespoons of ground grains. Mix compost and food together really well in your 18 gallon rubber tub. Using a drill and paint mixer for this will speed up the mixing process.
pH
The pH needs to be between 5.6 and 7.0, the closer to 7.0 the better.
To raise the pH:
- Add 1 tablespoon of agricultural lime per 3-4 gallons of food/compost
- Mix well (add some water if lime is not incorporating into compost well–if you can still see the lime)
- Let sit for 15 minutes
- Take the pH again
- Continue adding lime at that rate until the desired pH is reached
In the unlikely event that you need to lower your pH use:
- peat moss
- coffee grounds
- whole wheat flour
- cornmeal
If those don’t work, mince or puree citrus fruit and add about a tablespoon per 5 gallons compost, incorporate really well into the compost, and add a bit of water. Check the pH and continue adjusting accordingly.
Vermicomposting Step Five: Putting It All Together
- Fill bins with compost/feed to ventilation holes – do not to tamp it down.
- Add 1 pound of worms for each 3.5 gallons compost.
- Put the water proof thermometer in one of the bins.
- Put the lids on the bins.
- Set fan on low and aim it for best circulation.
- After 24 hours, check the worms.
You will always have a few escapees, but if most or all of them are trying to escape, you know you have a problem. Double check:
- pH
- inside bucket temperature
- moisture levels
Adjust parameters accordingly. Note: if inside bucket temp is too high often your pH is too low.
Vermicomposting Step Six: Harvesting The Black Gold
In 1.5-2 weeks, the worms will be out of food and your bin should be about 1/4 – 1/3 full of castings. There are a couple of ways to go about harvesting, depending on how pure you want your castings.
Collecting Worm Castings – Method 1:
- Dump entire contents of bin onto a well lit surface.
- While waiting for the worms to move to the bottom of the pile, hose down and scrub bins with a cleaning brush, taking special care to clean the vent holes.
- Separate castings/compost from worms by hand–add product to your finished compost stash or your garden.
- Re-bed your worms into their clean bins.
Collecting Worm Castings – Method 2:
Use 1/8″ screen (hardware cloth) to harvest a purer product. I really like the instructions for the harvester referenced above, but if you find something you like better, by all means try it and let us know how it goes. Remember to clean bins before re-bedding worms.
Whichever method you choose, after a few harvests, you will need to weigh your worms. More than likely you will have gained some worms, but if there are less than what you put in to begin with, you’ll need to do some trouble shooting.
This is a guest post by Corinna Fritz. Corinna and her husband Dustin share a passion for family, homeschooling, homesteading/self-reliance, nature and small businesses. Corinna’s understanding, love and respect for livestock, gardening, worms, and natural flora and fauna began when she was a young girl living on a ranch in Wyoming. These days the Fritz family are small business owners and novice homesteaders on 6 acres of land in the temperate rain forest of Washington state. You can read more about their adventures at: http://cyberscryber.blogspot.com/.
BR>
Common Sense Homesteading
about using common sense to be more self-reliant, with an emphasis on home
food production.
2013-02-22 21:31:18
Source: http://www.commonsensehome.com/vermicomposting-raising-worms/
Source:


