

| Online: | |
| Visits: | |
| Stories: |

| Story Views | |
| Now: | |
| Last Hour: | |
| Last 24 Hours: | |
| Total: | |
Make a Raised Garden Bed Out of Pallets

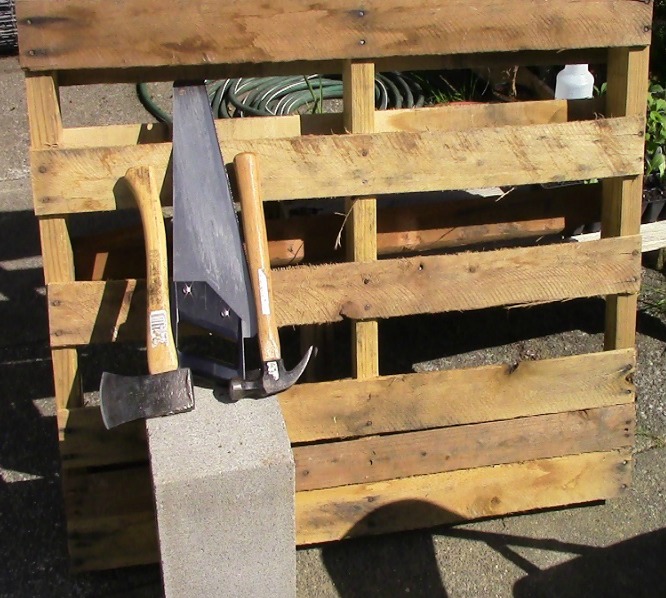
MATERIALS NEEDED
 Pallet: look for a pallet that has at least 4 intact boards (the more the better in case of splitting while prying) that are held on by no more than about 6 nails each. This will make it easier to pry the boards loose.
Also, make sure your pallet is free from any kind of liquid or other contaminant that you do not want in your garden.
Hammer: You will use both the hammer end and the prying end, so a regular hammer is needed.
Hatchet: This does not need to be sharp as it will only be used to wedge.
Saw: I use a hand saw, but any kind of saw that cuts wood will work.
Cinder Block: This just needs to have a flat surface and a square corner so you can straighten the nails you pull out of the pallet for re-use.
CONSTRUCTION
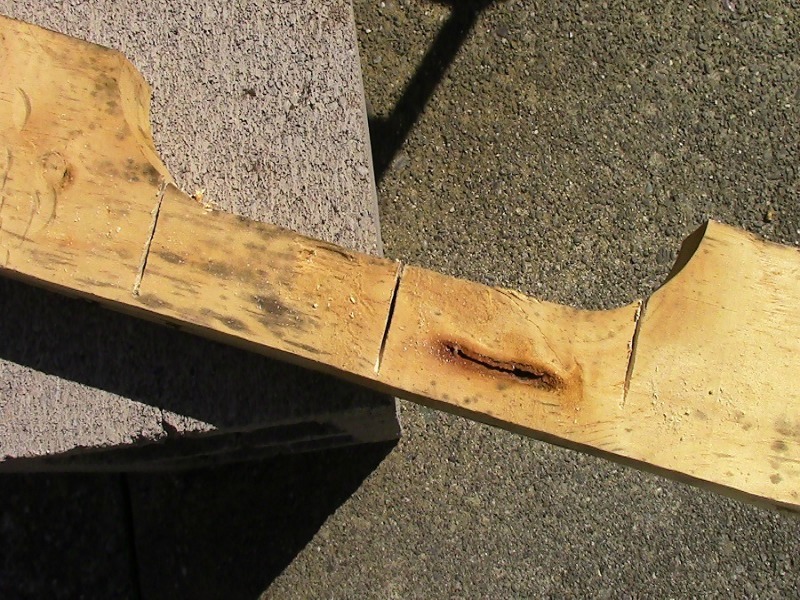
Set your pallet up against a wall or something that will support your prying at the boards with your hatchet and hammer.
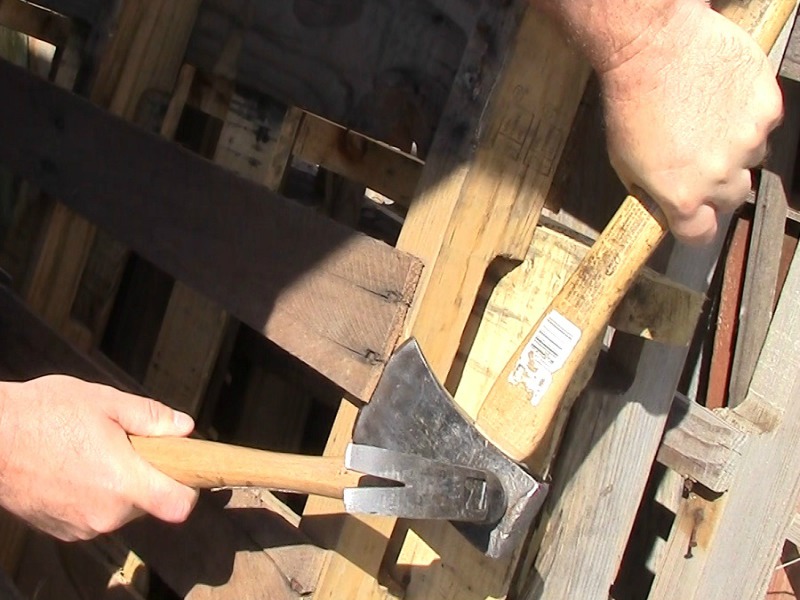 Being careful not to split the wood too much, hit your hatchet in between the end of a board and the cross beam it is nailed into. Pry back and/or forth. Move the hatchet around, trying different angles until you are able to pry. I press with my foot at the base of the pallet to help keep it from moving around while I wedge and pry.
Each pallet is different. Some have thicker boards than others, but this one I am using in this example has very thin boards, so I am wedging with the hatchet at each corner. It helps to hit the side of the hatchet near its butt end with the hammer if it isn’t moving back and forth easily.
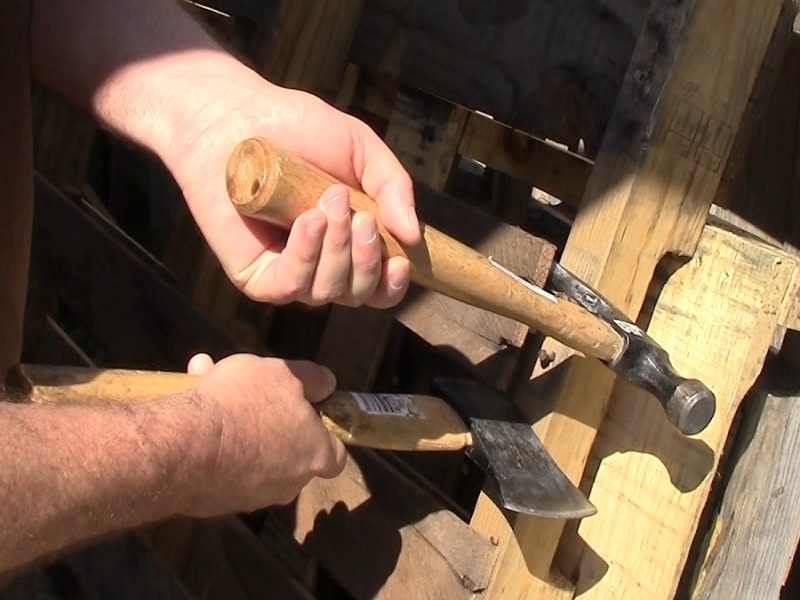 I then wedge the hatchet in the center, in between the nails, after wedging at each corner.
As with prying with the hatchet, I pry gently with the hammer alternating a few times between the nails if need be to avoid splitting the boards.
Gently use the pry end of the hammer to free the center of the board. Repeat until you have removed all of the center boards.
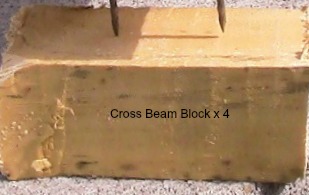
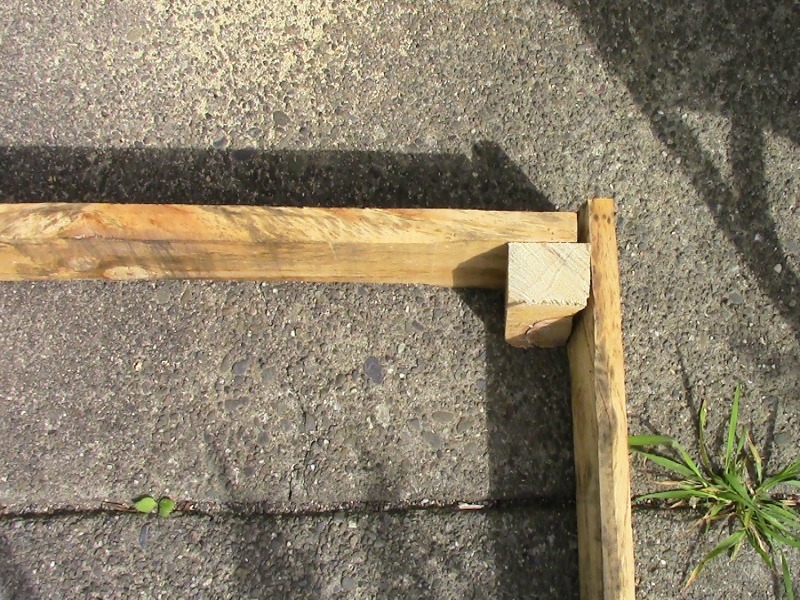
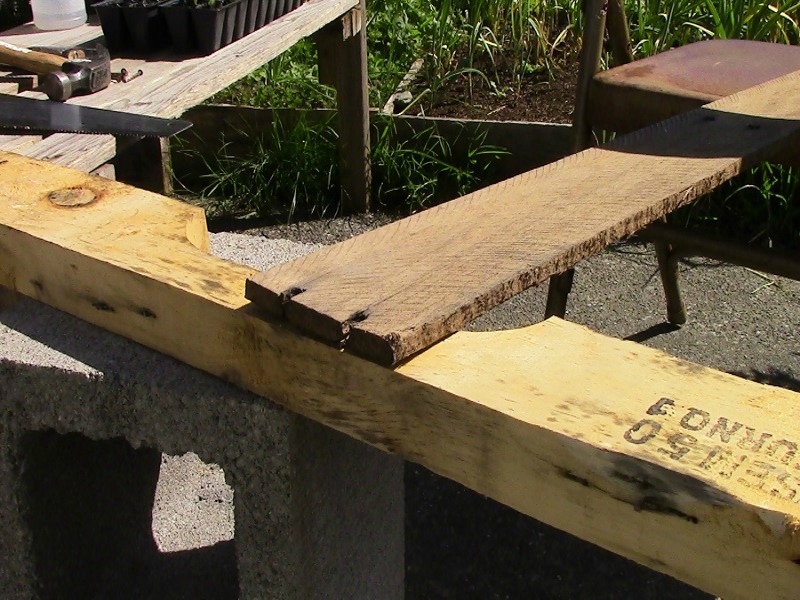 Place the end of 1 board in the narrow section of crossbeam to where you can get 2 blocks of the same width as the board out of the narrow section. If your board width is larger than would be accommodated by the narrow part of the crossbeam, that is ok, as any part of the cross beam can be used. I just like to use the narrow part as that is less to cut through and is all that is needed.
 You will make 3 cuts that are spaced from each other the width of the boards. This results in the 4 crossbeam blocks you will need in order to nail the 4 boards together into a square.
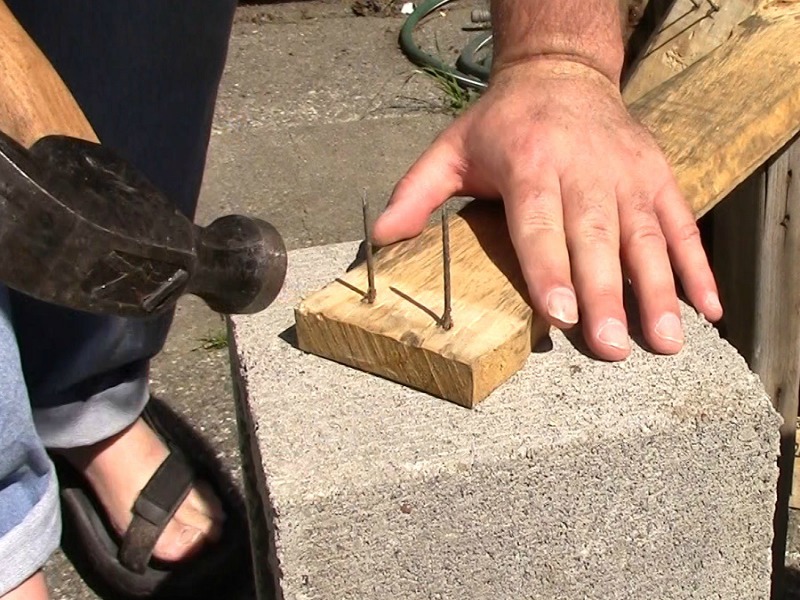 If the nails at the ends of the boards are usable as is… sometimes they just need a little straightening… then hammer them into 1 of the 4 crossbeam blocks.
 If they are not usable because their tips are dull or they are too bent… hammer them out and use different ones or straighten them, and then use them to hammer the board into the cross beam blocks.
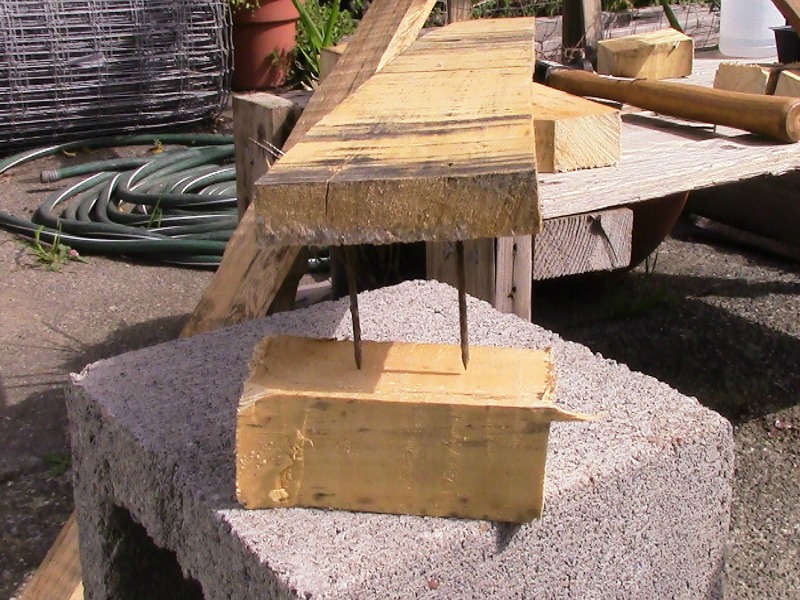
 You will now have 2 boards with 1 crossbeam block at each ends, and 2 boards without crossbeam blocks.
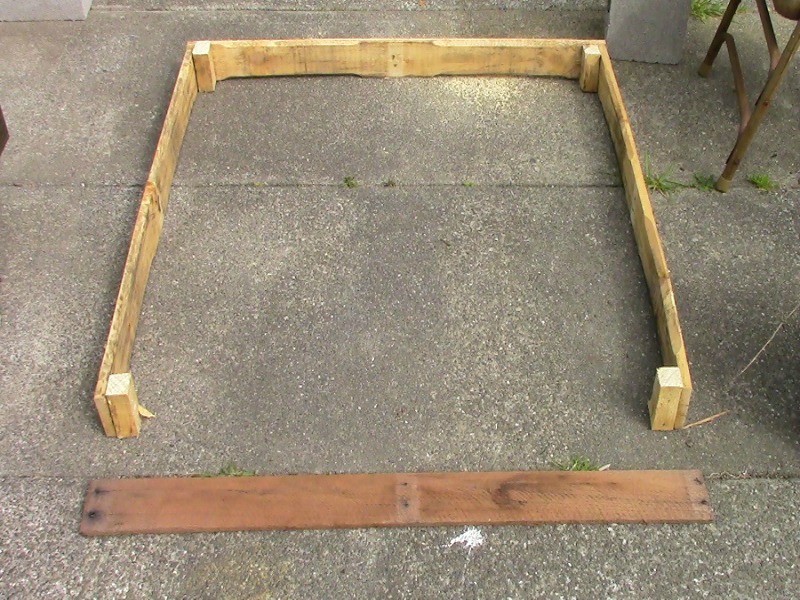 Hammer the boards without crossbeam blocks at the ends into the boards with the crossbeam blocks to form a square.
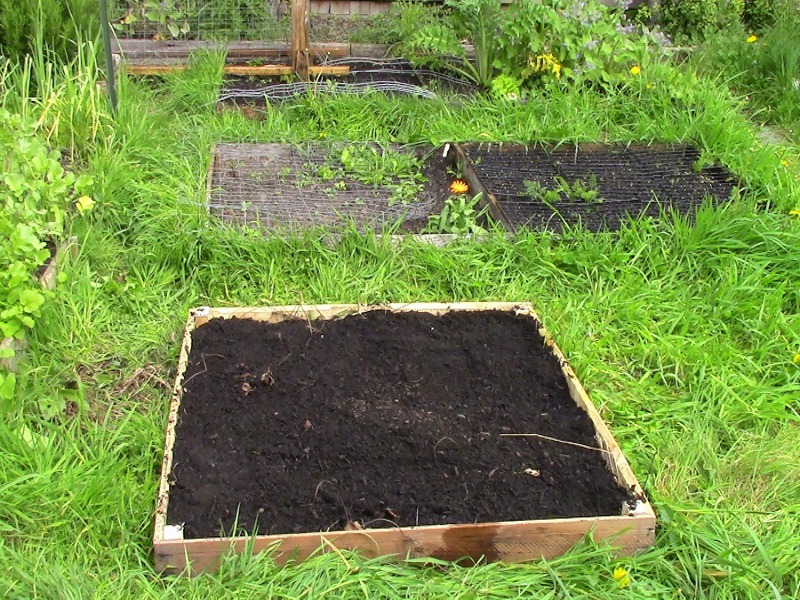
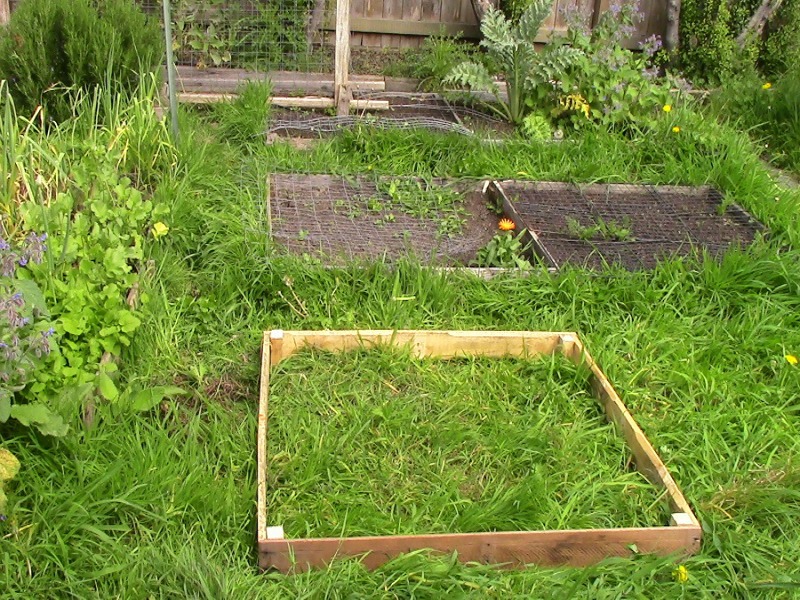 Place your new raised bed where you want it in your garden.
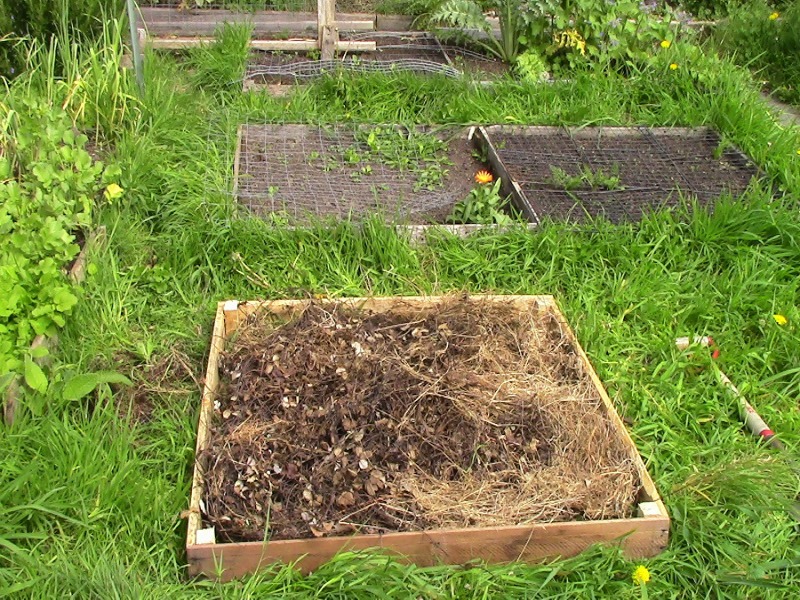 Optionally put in some organic material.
 Add soil and plant!
About Troy Boylan
 Ecoculture Village Founder & President; Anthropology BA, Interdisciplinary Studies: Ethnobotany BS. Two things I think are worth anything at all… all things wilderness and ecoculture.
Source: http://mikesbackyardnursery.com/2015/03/make-a-raised-garden-bed-out-of-pallets/
