

| Online: | |
| Visits: | |
| Stories: |

| Story Views | |
| Now: | |
| Last Hour: | |
| Last 24 Hours: | |
| Total: | |
Growing Christmas Cactus and Amaryllis

Christmas in August? Believe it or not, now is the time to work with your holiday plants such as poinsettias, amaryllis and Christmas cactus to prepare them to be in full bloom during the holidays.
Christmas Cactus and Amaryllis are two of the more popular indoor plants in the United States. They both have excellent flower displays and require very little care. Both plants can also be grown outside in the right environments. Below is an exploration of how to grow and care for both Christmas Cactus and Amaryllis.
Christmas Cactus
 Things you will need:
A few cuttings of Christmas cactus or a small plant, small pot, fast draining soil comprised of 50% chicken grit, rocks, or pumice/50% compost or sandy soil (Alternative would be coarse bark with a little compost or sandy loam soil about half/half on the ratio), and your hands!
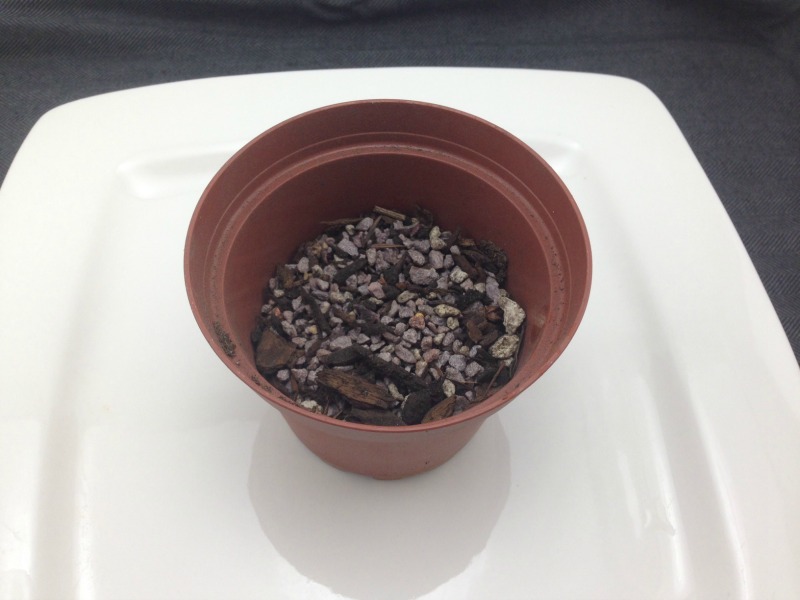 Step 1: Fill Pot Half Way
Fill pot half way with well draining soil mixture. It is better to go overboard on the well draining soil for Christmas cactus as they do not require high amounts of organic matter. You can obtain chicken grit from any animal feed store or small pumice works great as well to mix with your soil or compost.
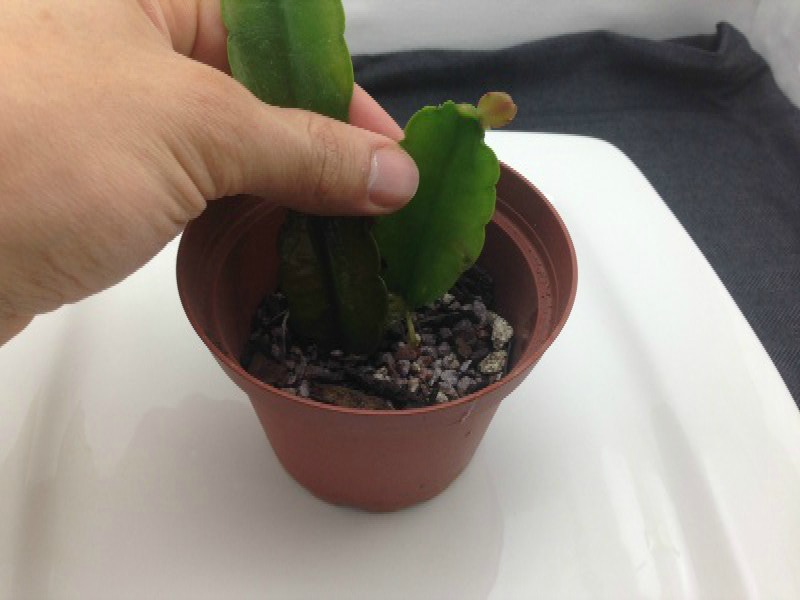 Step 2: Place Cuttings or Plant
Great trick to planting cuttings is to take your off hand and hold the cuttings in place centered in the pot as desired. Hold the cuttings so that the roots barely touch the soil. You will use your dominant hand to fill in soil.
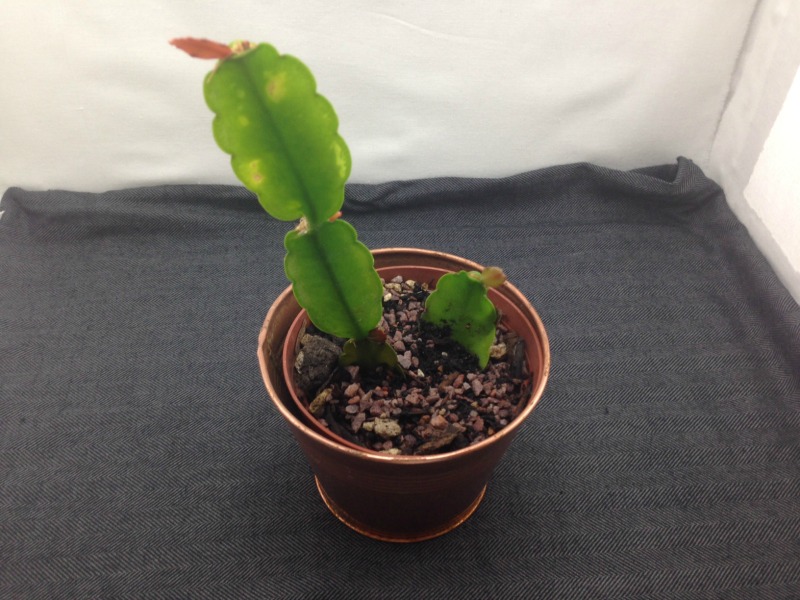
 Step 3: Fill in Soil
Fill in around the cuttings with your soil mixture with your dominant hand. Keep holding the cuttings upright as you do this so that they do not fall over or out of place.
With Christmas cactus, roots will develop from each narrow space in between sections of growth so in order to keep the cuttings standing up you will need to bury them in a good inch or two of soil mixture.
Don’t worry these cuttings will do fine with this. Press the soil lightly around the cuttings and they will be standing up and not falling over.
 Step 4: Water in Well
Water in well to eliminate air pockets. You will find that with fresh cuttings you do not have to water very often. Even a small mister bottle once or twice a day will do the trick or just water once a week normally. New cuttings will develop roots over the next few months.
These plants are extremely drought tolerant so watering once a week is more than sufficient.
Great plant to not have to worry about if you go on a vacation. If you are just purchasing one of these plants from a local nursery than watering once a week is all that is required.
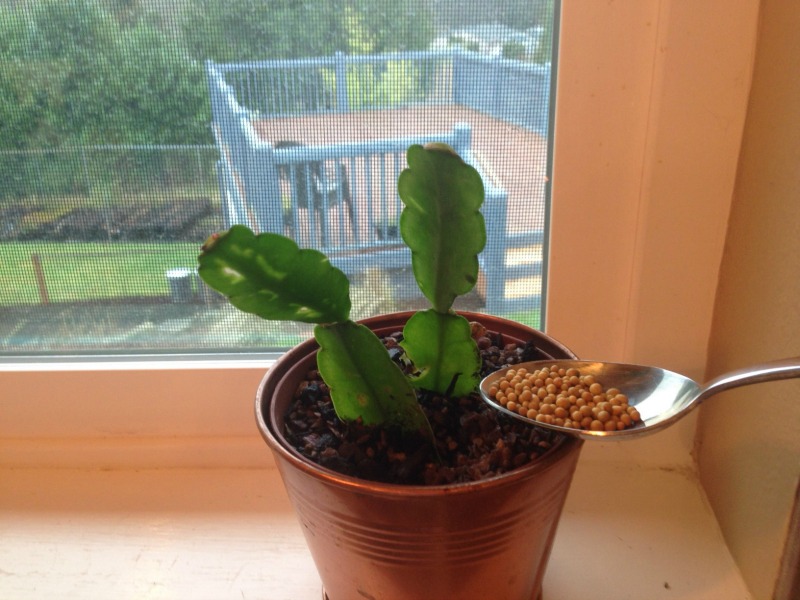 Step 5: Fertilize and Placement.
Suggest that you fertilize with an organic slow release fertilizer or similar product. Do not use normal fertilizer as this may initially burn some of the roots of the new bulb.
Slow release is the key as it will allow the plant to absorb small amounts of fertilizer over a 3-6 month period.
The fertilizer will assist with overall plant health and showy flower blooms. You really only need to fertilize once a year if at all.
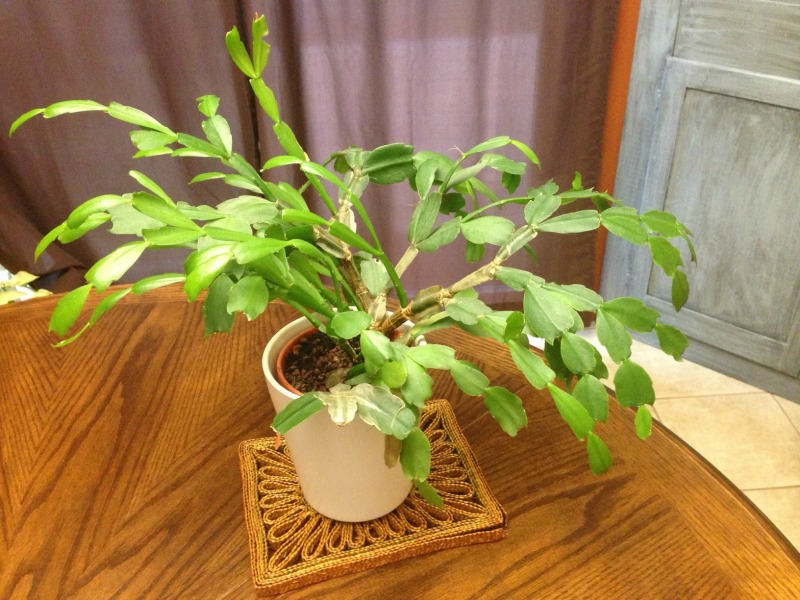 Place in front of a sunny window for best overall growth. Christmas cactus will bloom once a year with a spectacular display. They bloom when the days become shorter and the nights become longer.
They usually require 12 hours of darkness for best blooming. It is recommended by the University of Florida that you keep them away from artificial light during the winter if you want them to bloom at a certain time.
They can be grown outdoors in particular areas of the country if protected from freezing temperatures. To plant in the ground you need very specific conditions.
Excellent drainage beyond the normal that you would find in very desert like environments in Arizona, etc. Most failures will occur from too much moisture around the roots in the fall/winter. Outside they tend to prefer bright indirect light.
Amaryllis
Begin your bulbs November 1 – 15 for a Christmas bloom.
 Things you will need:
Amaryllis bulb, medium size pot, well draining potting soil suggested half peat moss/half compost or sandy loam soil and peat moss 50/50.
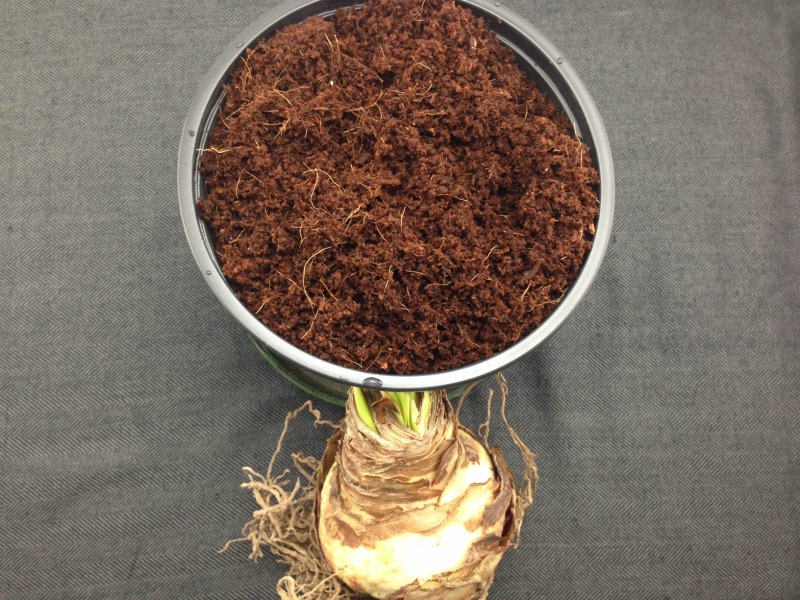
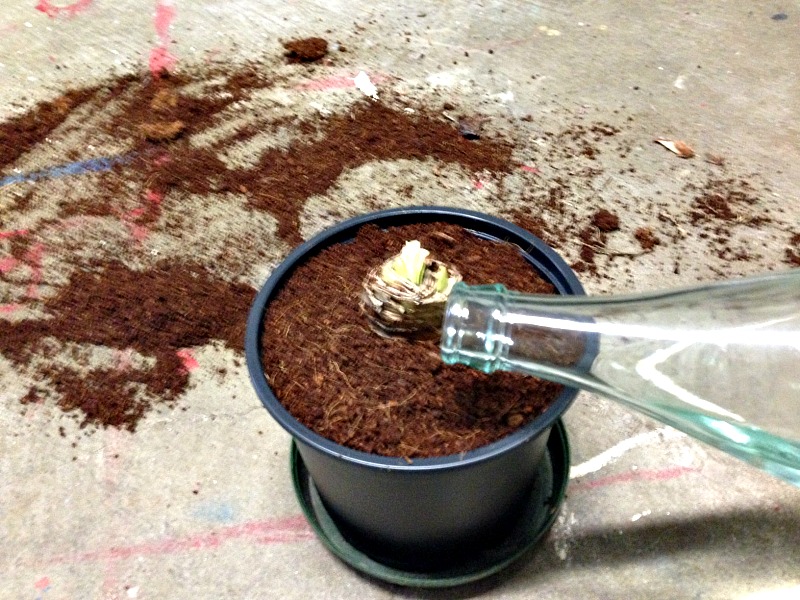
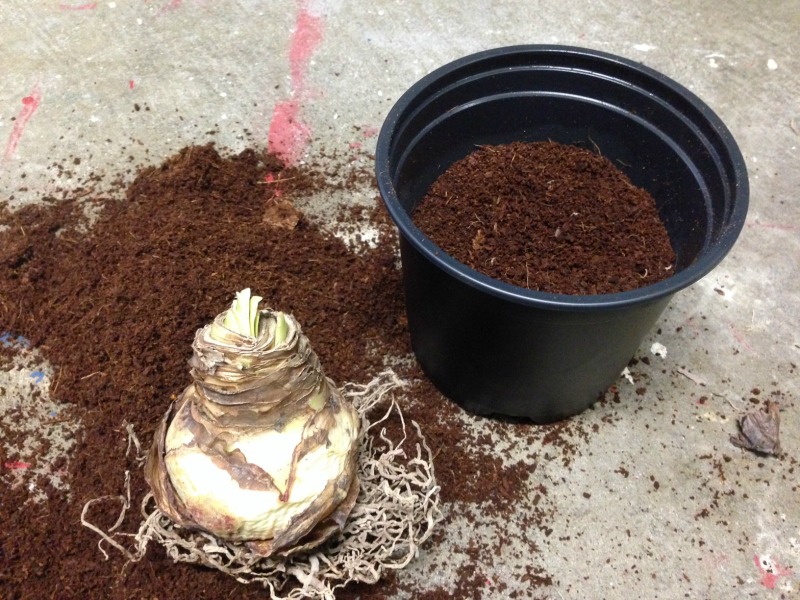 Step 1: Fill Pot Half Way
Fill your pot half way with potting soil mixture. Don’t worry too much about exactly what’s in the mix, just make sure the soil drains well and your not using heavy clay soils. Lightly tamp soil at the bottom of the pot.
 Step 2: Place Bulb
Place your Amaryllis bulb with roots facing downwards in the pot and lightly firm down. You can use larger size pots than the one shown in the picture.
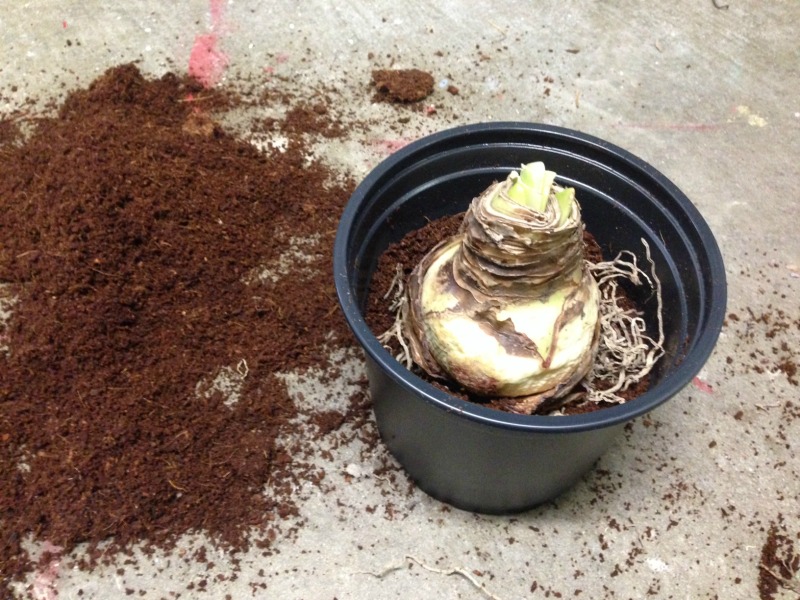
 Step 3: Fill in Soil and Water
Fill in soil mixture to about ¾ to 1 inch below the top of the bulb as this is the above ground portion of the bulb where the leaves will be produced and you should keep soil and moisture away from this to help reduce fungal and rot issues. Firm soil lightly around the sides and water in well.
After the first watering you do not want to water again until the leaves start to be produced and the plant is actively growing again.
Water sparingly 1-2 times per week inside and once a week in the summer time outside. Allow extra water to drain off.
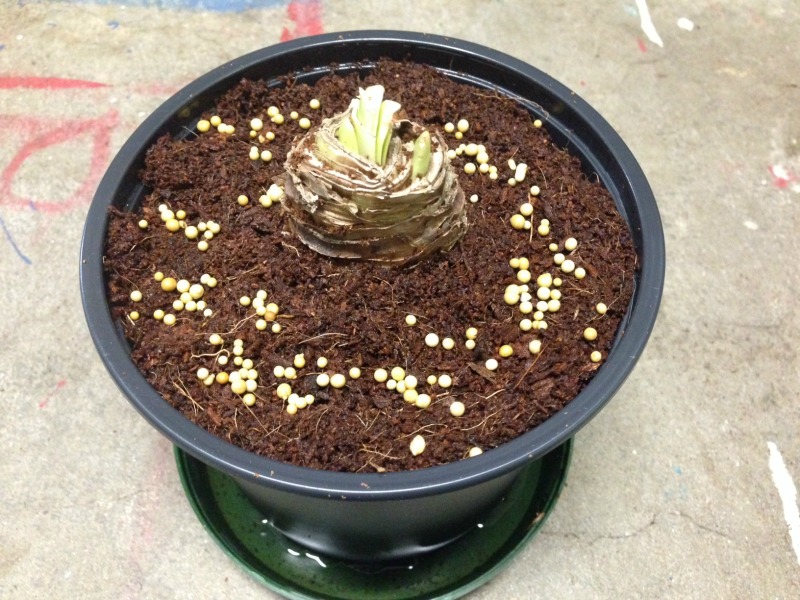 Step 4: Fertilize
Suggest that you fertilize with an organic slow release fertilizer or similar product.
Do not use normal fertilizer as this may initially burn some of the roots of the new bulb.
Slow release is the key as it will allow the plant to absorb small amounts of fertilizer over a 3-6 month period.
The fertilizer will assist with overall plant health and showy flower blooms. You really only need to fertilize once a year if at all.
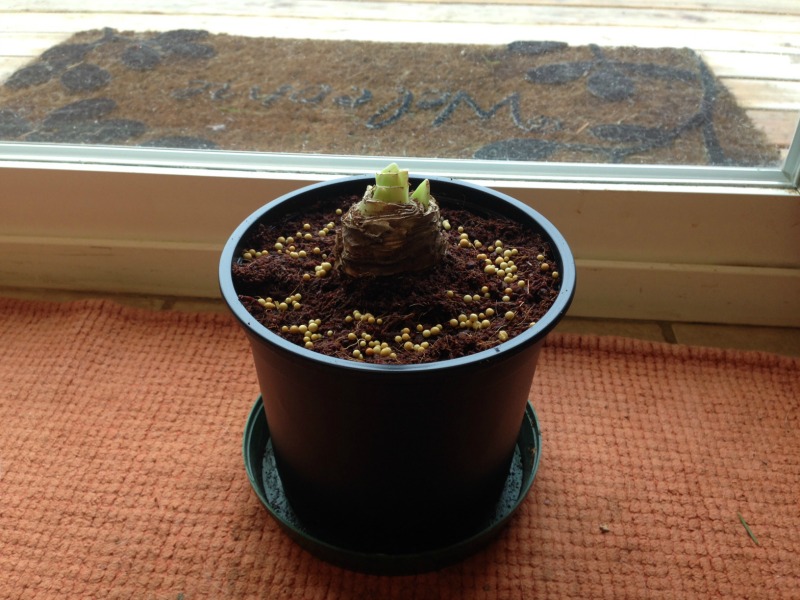 Step 5: Place in Sunny Location
Place your new Amaryllis bulb in the brightest location you have in your house. Soon small new leaves will emerge and later on very tall large flower blooms. The plants in smaller pots can easily become top heavy and fall over so it may require staking or placing some rocks around the pot for stability. Inside plants tend to bend towards the natural sunlight from outside so every few weeks rotate the pot so that it does not lean too heavily to one side.
Side Note: Amaryllis bulbs can do very well outside. The key is locating an area with full sun during the day and that has excellent drainage. The bulbs will not do very well if there is too much water in the soil around them during the fall and winter.
The location should have no standing water in it 12 hrs after a heavy rainfall. Sandy loam soils, soils with lots of organic matter in them, or properly amended soils will work. Well aged compost or peat moss can be added in large amounts and dug into the soil to help create better drainage.
During the winter time you will want to help protect the bulb by mulching over with bark, wood chips, etc with 2-3 inches of material. In the spring pull back the mulch to help keep the top of the bulb from staying too wet.
About the Author:
Jonathan Aflatooni is the co-owner of Blacklotus Landscaping LLC and co-owner of Amber Bear Nursery and Farm. Jon has many years of practical experience in the field, from propagating his own collection of plant life to creating and designing new landscapes. He looks forward to sharing with a wider audience some of the insights and knowledge he has gleaned along the way.
Source: http://mikesbackyardnursery.com/2015/08/care-christmas-cactus-amaryllis/
