| Online: | |
| Visits: | |
| Stories: |
How to make a survival knife from an old file (DIY videos)
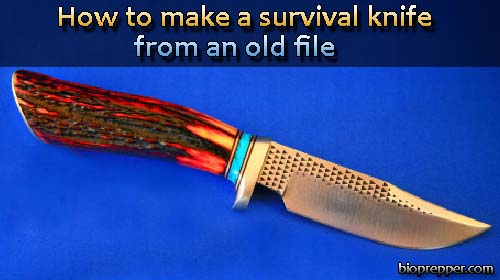
Would you like to have a quality survival knife for just a few bucks? I’m going to show you how to make a survival knife from an old file that will look great, last for a lifetime and will have the quality of an expensive survival knife.
Most old files and leaf springs are made of high carbon steel, which is ideal for knife making. Unfortunately most new files are made of cheaper mild steel that has been case hardened, not really suitable so try to get an old file. The best place to find them is at garage sales or swap meets where often you can pick up a bundle of old files for a few bucks.
Tools and materials you need
For the knife blade you’ll need an old file, some hardwood for the handle and some epoxy to attach handle and 2-3 brass pins.
You’ll need some basic metalwork tools like a hacksaw and some files. A drill, vice and hammer as well as some abrasive paper.
Anneal the file before getting to work
Before getting to work you’ll need to anneal the file to make it soft enough to work with. You can do this by putting it in a fire of wood or charcoal and blowing air through to speed up the heating process.
Leave it in the fire for a while, until it gets to a bright orange color, before allowing it to cool down slowly. The best way to do this is to let it stay in the fire until it has gone out and cooled down completely.
Shape the knife
After passing through the whole process to soften the file, trace the shape of the knife. Hold it in a vice and cut the shape out with a hacksaw. Next use a file or bench grinder to finally get to the shape you like. Before starting to bring the bevel it’s wise to mark out how far up the blade you would like it to go. Then gradually file or grind the bevel to the angle you want. While the steel is in the workable soft state get the surface of the blade smooth and clean with abrasive paper. Don’t forget to drill the holes for the handle, depending on the design you’ve chosen.
Quenching And Tempering
This is a 2 step process to get the steel to a hardness where it will hold an edge and be robust enough to put to use. First heat the blade up in the fire again to bright orange color. Cool the blade in oil. This process will harden back the metal.
Finishing the survival knife
Take the blade to the finished look then cover the edge with paper and duct tape. Take the pieces of wood and shape them to fit the handle. Drill the holes and place the brass pins. Finish the handle with sandpaper then seal the wood with oil or epoxy.
Find out more about using cold weapons for survival on Bulletproof Home
Here’s a step-by-step video guide on how to do it.
Making Knife Blades from an Old File – Part 2-VIDEO
Making Knife Blades from an Old File – Part 3-VIDEO
If you found this article useful, please like our Facebook page and stay up to date with the latest articles.
The next video uses a different technique to make a survival knife from a file but I really liked the finished product so I decided to show it to you too.
Blacksmithing Knifemaking – Forging A Rasp Chopper Knife From A Farrier’s Rasp – Part 1
Blacksmithing Knifemaking – Forging A Rasp Chopper Knife From A Farrier’s Rasp – Part 2
You may also like …


