


| Story Views | |
| Now: | |
| Last Hour: | |
| Last 24 Hours: | |
| Total: | |
A Second Permaculture Hedgerow

Hedgerows are a really nice way to turn fencelines into productive areas. By planting them with various edibles, they provide food and shelter, plus look pretty. Eventually I'd like to establish edible hedgerows between all of our paddocks. Even though our first one has been slow to establish, it seemed like time to start on another one.
 |
| Detail from our Master Plan. (Blue is planned but not yet implemented). |
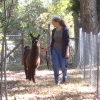
This one will be a short one, between the two doe pastures. It's indicated in yellow above (see “Master Plan 2016” for the big picture).
I started with the existing fence and measured out three feet on either side from it. The finished hedgerow will be about six feet wide, which should allow for shrub growth plus access along it's entire length.
 |
| T-post pounder on top of one of the t-posts. |
Dan usually sinks all the t-posts for our fencing with a manual t-post pounder. Since our fencing is four feet tall, the 6.5-foot t-posts are sunk about two and a half feet. He's 5' 9″ and can just manage the height and weight required to do that. I'm 5' 5″, and so needed a stepstool to get a little more height.
Because we've had plenty of rain, they were fairly easy to pound into the ground. Once they were all in, I wired cattle panels to the new posts. Cattle panels allow the goats to eat what's growing in the hedgerow without eating it all down. Chickens have access through cattle panels as well, for forage and shelter.
The last step was to remove the old fence which then ran down the middle.
 |
| It's a little hard to make out, but there are three rows of fence there. |
After removing and rolling up the old welded wire fencing, I set about to remove the old t-posts. I assumed that would be relatively easy to do with our t-post puller.
 |
| These are old photos from an earlier post, but they let you see how it works if you aren't familiar with these things. |
 |
| Close up. (We got ours at Tractor Supply Co.) |
The trouble was, after five years they were so stuck in our clay soil that I could only remove one with that puller. Then Dan gave it a try and concluded that we needed to pull out the big guns.


Tractor power and a good stout chain made a quick job of it!
Now I have to get it ready to plant. All of those holes where the posts used to be will be filled with organic matter and I will also put in a few mini-swales (similar to the one I put in the garden) to help retain rain run-off.
 |
| What I've been amazed at is how many earthworms are in that clay soil with seemingly no organic matter. |
I started by transplanting the hazelnut bushes from my original hedgerow. They weren't getting enough sun to be productive, so I moved them here.
 |
| Currently working on swales, berms, & transplanting. |
The hazelnuts are still dormant so you probably can't see them in the above photo. I planted them in the swale berms. I still have to mulch the foremost swale, rake out the lumps of clay, and continue planting to get the soil covered.
The timing worked out well because it rained last night after transplanting them yesterday. Leaf buds are just forming so I hope they'll be happy here.
 |
| Hazelnut bush with just-forming leaf buds. |
Time will tell.
Source: http://www.5acresandadream.com/2017/03/a-second-permaculture-hedgerow.html
