
| Visitors Now: | |
| Total Visits: | |
| Total Stories: |

| Story Views | |
| Now: | |
| Last Hour: | |
| Last 24 Hours: | |
| Total: | |
Off-Grid Part 3 of 6: Masonry Heater
“Courage is almost a contradiction in terms.
It means a strong desire to live taking the form of readiness to die.”
*****
Off-Grid Part 3: Masonry Heater
By Bev Sandlin
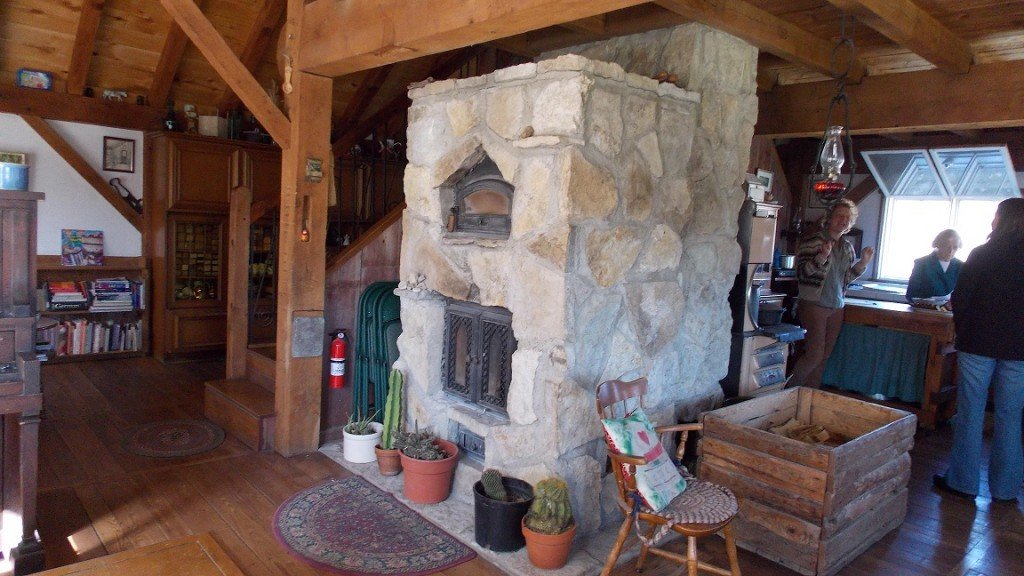
The heart of a homestead is the hearth. And this masonry wood heater is owner built from native limestone and includes a baking oven. It was built in the center of the home so that its warmth could radiate outward and upward to keep the whole home cozy and warm in the northern winters.
Only the doors, firebrick, piping and mortar were purchased to create this mammoth heater. The cast iron doors were purchased from a masonry heater dealer in Vermont and the rest locally.
Note the wood box and oil lamp above it to the right of the picture and how the wood cook stove is placed directly behind the masonry heater in order to share the same chimney.
Masonry heaters are a traditional heater from northern Europe. However, they were only introduced into North America in the last 20 years. Essentially a fire is burned rapidly, usually one to two hours, and then the heat is stored in the large thermal mass. Because the fire burns hot and rapidly it burns clean and there is no creosote buildup in the stove or chimney. The radiant heat is steady and cozy, and does not dry the skin or sinuses like traditional wood stoves. This is also a very safe way to heat with wood, as the fire can be timed to be out before you go to bed or leave the house.
The owners of this masonry heater said they only need to burn a fire once a day to keep the whole house warm unless it is below zero, then two fires a day suffice. And they only used three cords of wood between the masonry heater AND the wood cook stove last year! I was very impressed with that, given that I used an average of seven cords of wood every winter for my very efficient wood stoves.
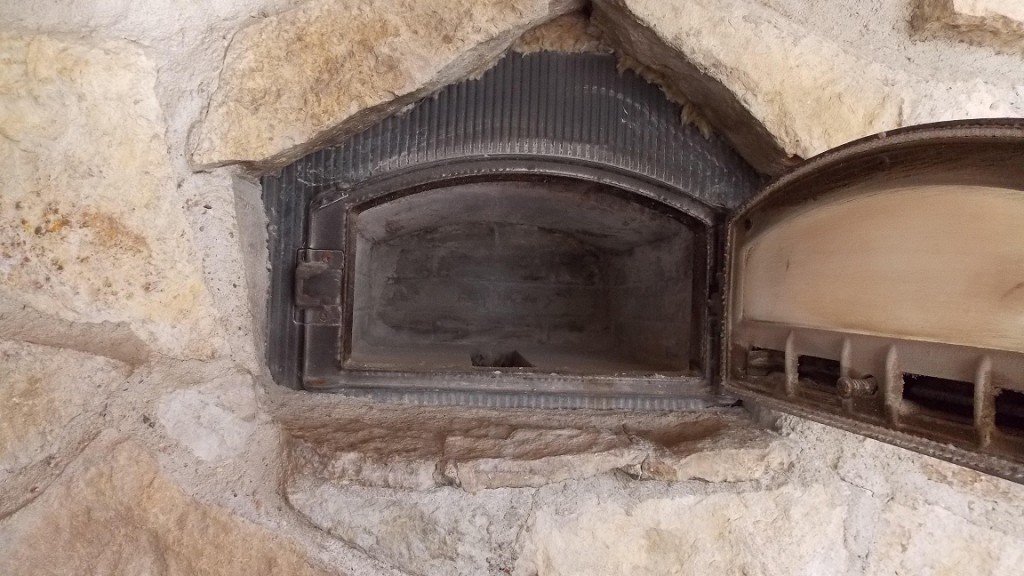
The upper stove is a baking oven. Note the bottom where the heat rises but the ashes can also be scraped down for ease of cleaning. The owners often bake bread and pizzas in the oven, just after the fire has died down, and use it was a “warming drawer”.
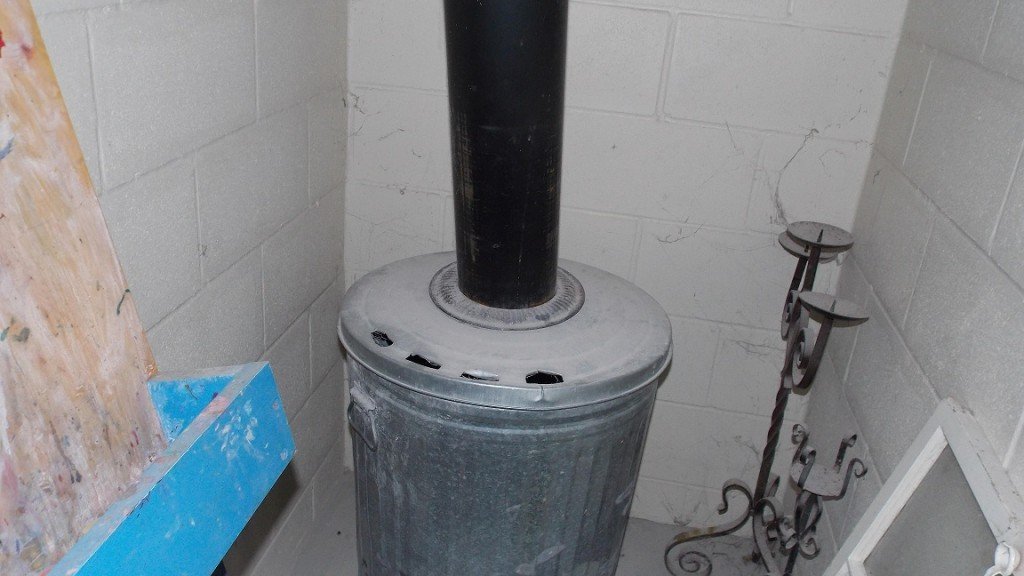
In the basement, directly below the masonry heater is this ash can—a large galvanized trash can. Note the strength of the cement block wall to hold the weight of the stone above it. If you have ever dealt with wood stoves you realize immediately how convenient this is to clean out the ashes! Plus the wood ash is excellent for making lye and enriching the garden (do not use wood ash where you plant potatoes as they will scab).
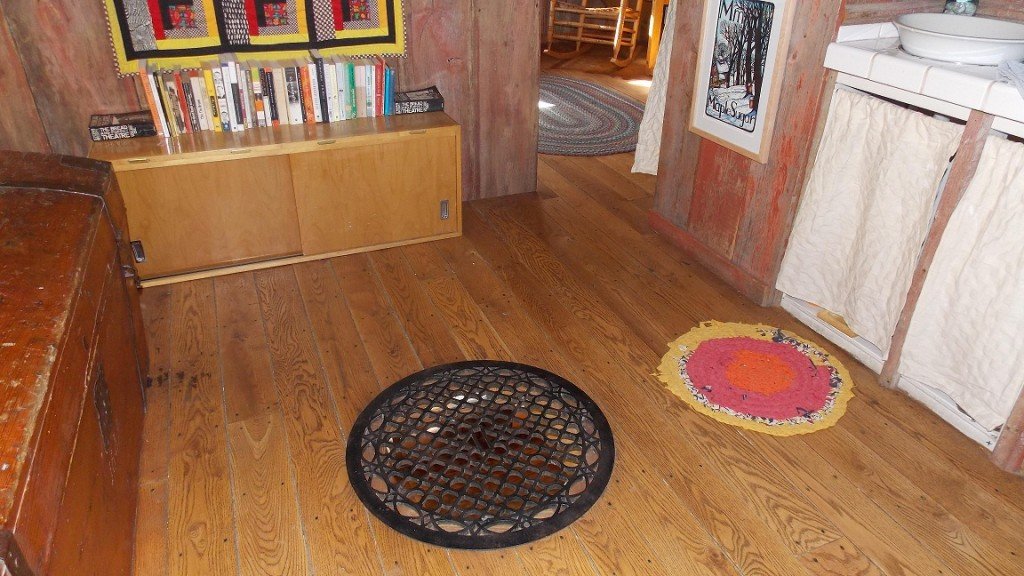
With the masonry heater being the first decision that was made in building this homestead, the rest of the home was designed around the concept. Heat rises and fills the upstairs sleeping areas with warmth. This round antique heat vent in the upstairs of the home allows the radiant heat to rise more efficiently than just through the stairwell.
With two very active teenaged boys in the home, they decided to convert their bedroom area into more room for hobbies and homeschooling. The boys converted the former upper loft area that was only used for storage into a sleeping area. This picture shows the homeschooling area with the ladder leading to the upper loft bedrooms for the boys.
Over the parents’ bedroom is this upper loft storage area.
The classic owner built wood shed to keep the wood dry. Note how these shed is built of recycled lumber, used galvanized tin, and posts harvested from the wood lot. The homeowners’ split all their wood by hand.
The only thing that I can add to this wonderful and efficient off-grid heating system is the concept of an outside-loading wood box. When I heated with wood, I chain sawed (Yes I know, very crude carpentry.) a hole in the side of the house next to my woodstove. I built a box around that with doors on the outside and inside—insulated. I had a shelf for kindling and newspapers and the box could hold up to 3 days’ worth of wood. Below was another box for a winters’ worth of kindling only accessible from the outside. This box was under the front porch on the house. That was perhaps the best thing I ever did for heating with wood. No carrying wood inside with all the accompanying mess!
Tomorrow we will move to water and waste on this homestead.
*****

A smile for you…
Some people try to turn back their odometers. Not me, I want to people to know “why” I look this way. I’ve travelled a long way and some of the roads weren’t paved.
© 2012, Seasoned Citizen Prepper. All rights reserved. On republishing this post you must provide link to original post.
2012-11-10 09:20:08
Source: http://seasonedcitizenprepper.com/off-grid-part-3-of-6-masonry-heater/
Source:


