
| Visitors Now: | |
| Total Visits: | |
| Total Stories: |

| Story Views | |
| Now: | |
| Last Hour: | |
| Last 24 Hours: | |
| Total: | |
Building a Sawbuck: Work Smarter in the Woodpile
by Todd Walker
Work smarter, not harder.
My daddy’s words echo in my head every time I’m half bent over a project. They rang true recently when a red oak branch fell and crushed my backyard fence.
I cranked ‘Big Orange’ (my chainsaw) and sliced through the limb like a hot butter knife through butter. The thought re-emerged in my cluttered mind, thanks to the fence supporting the limb at waist height, that I needed to build something to hold all the long firewood about 3 feet off the ground while Big Orange made shorter firewood.
A sawbuck was in my future!
Sawbucks were common in pioneer days before the advent of modern chainsaws. This woodpile tool is a simple trestle with cross bracing that not only cradles logs but is responsible for saving the backs of millions of homesteaders.
Let’s get started building you a cheap, but sturdy, sawbuck shall we!
Material needed:
- Eight – 4 foot 2×4′s – I used leftover pieces I had lying around my shop. You can purchase three 8 footers from the lumber store for under 10 bucks.
- Three bolts (about 4 inches long each), 9 washers, 3 nuts. I repurposed some hardware from a wooden swing set I disassembled years ago.
- 18 – 3 1/2 inch screws for the brace pieces. Again, already had these on hand.
Tools needed:
- Saw – circular or miter
- Drill and bit sized to match the size of your bolt.
- Impact driver or drill to sink screws. You could use a screw driver if you have scary strong forearms. Or just hammer nails to fasten the braces.
- Measuring device and a pencil.
- Straight edge or framing square.
- Flat surface for assembly.
- Ratchet, socket, wrench to tighten nuts.
- Speed square if you’re not using a miter saw.
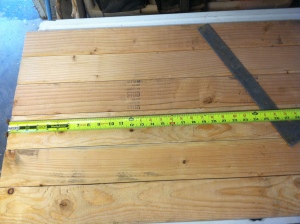
Step 1: Cut boards to 4 foot lengths. Set aside 2 of the boards for bracing. On the end of each of the other boards, cut a 30 degree angle on each. I used a powered miter saw. Be sure to leave the boards 4 foot long after the angle cut.
Step 2: Measure 18 inches down from the square end and mark all 6 of the angled boards. This marks the spot for your bolts to hold the cross pieces together.
Step 3: Drill a hole in the center of each board on the line you just marked. The diameter of the hole needs to match the bolt you’re using. Use a drill press if you have one. If not, drill as straight as you can with a hand-held drill motor.
Step 4: Assemble the cross pieces by inserting bolts and washers through three pairs of boards. I used 2 washer on the outside and one in between each pair to help with folding the sawbuck for storage. The middle washer is not necessary. Tighten the nuts. You don’t have to torque the nuts too tightly. Just enough to hold and be able to easily fold the sawbuck when not in use.
Now you have three cross pieces assembled.
Step 5: Fold each cross-piece together so the edges are flush. Lay them on a flat surface and measure 20 inches down from the square end and make a mark on the edge of each board. This where you’ll place the top edge of your bracing boards.
Lay the cross pieces edge side up on a flat surface. Space the two end cross pieces 4 feet apart. Now center the middle cross-piece between these two.
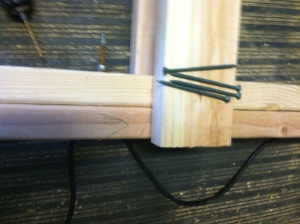
Lay your first brace on the 20 inch mark. Drive two screws (pre-drill holes) into three of the cross piece legs. You may want to pre-drill pilot holes to prevent splitting your brace wood. Use pressure treated wood if you’re buying lumber for this project. I used untreated because that’s what I had.
Important note: Flip the sawbuck over and attach the next brace to the opposite legs on the other side of the sawbuck. If you attach the braces to the same legs, it won’t fold out.
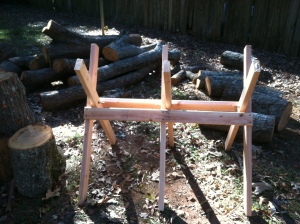
Step 6: Set up your new sawbuck. Unfold the sawbuck until the legs meet the bracing. You can adjust the height by either moving the brace up on the legs of the sawbuck or attach an adjustable chain to the outside legs of the sawbuck.
Advantages of sawbucks:
- Raises logs to a comfortable height for sawing
- No chance of grounding your chainsaw blade in the dirt
- Essential for building your log cabin in the woods
- Secures round logs. Round things tend to roll away
- Cheap to build
- Fold up for compact storage
- Safety – lessens the chances of kickbacks than sawing firewood on the ground or in a pile
- Saves your back – especially if you’re using a crosscut or other man-powered saw!
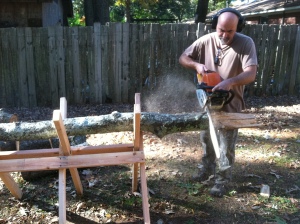
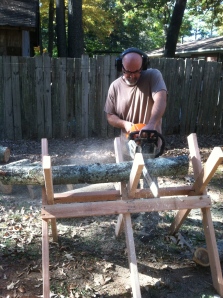
Here’s my sawbuck in action.
To raise the height of your sawbuck, screw the two brace boards at 19 inches instead of 20 inches as described in Step 5. When firewood cutting season is over, fold it and storage it.
Hope you enjoyed this simple project. Let us know if you have comments, questions, or suggestions to make our sawbuck better.
Keep doing the stuff!
Todd
P.S. ~ Thanks for sharing the stuff! If anything from our site adds value to your life, please pass it on. You can also connect with us on Twitter, Pinterest, and our new Facebook page.
Copyright Information: Content on this site (unless the work of a third-party) may be shared freely in digital form, in part or whole, with a link back to this site crediting the author. If you are interested a third-party article, please contact the author directly for republishing information.
Source: https://survivalsherpa.wordpress.com/2013/11/06/building-a-sawbuck-work-smarter-in-the-woodpile/


