


| Story Views | |
| Now: | |
| Last Hour: | |
| Last 24 Hours: | |
| Total: | |
“Wood” AR-15 Build – Part Four

(Before It's News)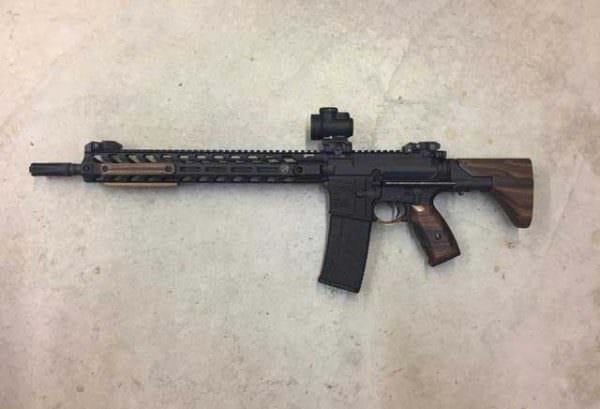
![]()
USA -(Ammoland.com)- This is the final part of a series of four articles on our Wood AR-15 Build. If you missed them you can read part one here, part two here, or part three here.
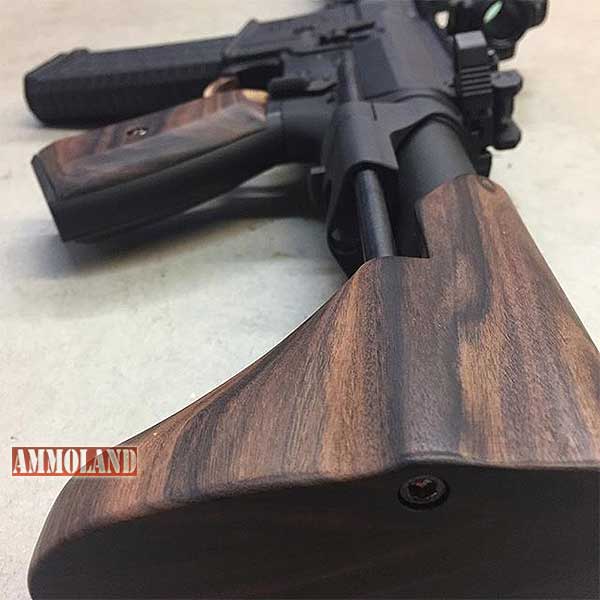
Since the last update, we have finish-sanded each of the pieces of the wood AR-15 furniture and applied multiple coats of high gloss sealant.
Finishing the pieces took almost two weeks and three different types of sealant applications.
This was far longer than we anticipated and primarily due to the lengthy drying time of each layer of sealant. Now, with all the layers of sealant applied and dried we can officially say that the “Wood” AR-15 Build is complete.
For those of you who are interested in perusing a similar project, here are some takeaways from the building process:
- Wood type matters. The Brazilian Rosewood we selected is just about as hard of a wood as you can find. This is very important to ensure the wood is shapeable to very tight tolerances and that it will hold up over time.
- It all takes much longer than you would think. Most woodworkers understand this, but we found this to be especially true for this project. The goal of this project was to hand-make wood components that mate and function precisely with steel and aluminum… And we had no plans or experience making firearms components. From start to finish, it has taken about two months of (part-time) effort to complete the build.
- It is worth your time. This obviously isn’t true for everyone, but we have found tremendous value in taking an active role in the construction of this rifle. Anyone who has assembled a rifle from a set of carefully chosen components knows this. We found it to be even more the case in this project because we physically built the wood components.

Wood AR-15 Grips

If you’d like to see more pictures of how the rifle, head over to BlackWoodUSA.com. If you’d like to learn more about the build process checkout Black Wood USA’s Blog.
Page Links:
- https://www.blackwoodusa.com/wood-grips-ar-15
- http://www.blackwoodusa.com/wood-rail-panels-ar-15
- http://www.blackwoodusa.com/wood-stocks-ar-15
About Black Wood USA:
BlackWoodUSA.com was started as a platform to tell the story of building the furniture for our wood AR-15 project. Black Wood USA’s mission is to complete the Wood AR-15 Build, show how the furniture is made and explore the possibility of producing the components for sale.
This post “Wood” AR-15 Build – Part Four appeared first on AmmoLand.com Shooting Sports News .
Source: http://www.ammoland.com/2017/02/wood-ar-15-build-part-four/
