| Online: | |
| Visits: | |
| Stories: |
Keypad Programming the BaoFeng UV-5R
 If you want to do more than simplex communications over short distances, then you’ll need to use a repeater. In this post we’ll show you some simple Keypad Programming the BaoFeng UV-5R.
Keypad Programming the BaoFeng UV-5R
 The BaoFeng radios are great and are available at a great price. They offer amazing frequency coverage: 2 meter, 70 cm, FRS, GMRS, MURS, Public service Frequencies, NOAA weather frequencies, Marine VHF. Every prepper should have a hand held radio, and the BaoFeng is a good choice for those looking to get into HAM radio without the traditional large cash investment. Let’s setup our BaoFeng so we can talk via a repeater and get some good distance out of our radios.
Programming the BaoFeng UV-5R
Feel free to look up your local Repeaters in the ARRL Repeater Directory and program the channels, and offsets for repeaters local to you.
The example below is for my radio club’s repeater (http://k3smd.org/) in Southern, MD.
443.700 MHz (70cm)
5 MHz negative offset
Saved to channel 11
CTCSS/PL tone 179.9
Anything in brackets “[ ]” indicates a button of that name. You can also press [MENU] and use the up/down arrows to get to menus (they are numbered) instead of [MENU] and the number of the menu (example [MENU] 7 [MENU] )
 |
1.) Set your BaoFeng to VFO Mode (aka Frequency Mode) by pressing the VFO/MR button. When you press it you should hear a voice say “frequency mode” or “channel mode”. Obviously we’re wanting to hear “frequency mode” to indicate the proper mode. |
 |
2.) Set your Display to A (top number of the 2 shown) with the Blue A/B button. The tiny triangle will be pointing upward and will be beside the upper set of numbers. |
 |
3.) Disable TDR (Toggles between the A and B channels).
|
 |
4.) Clear existing Data from the channel you want to program.
|
 |
5.) Set the Repeater Offset.
|
 |
6.) Enter the Transmit Frequency Shift.
|
 |
7.) Set the correct CTCSS or DCS codes (aka PL see HAM Radio 101 – Intro to Repeaters )
|
 |
8.) Enter the repeater output frequency, 443 . 7 0 0
|
 |
9.) Store the RX (receive) frequency settings to a memory channel (valid channel range = 000 to 127) We cleared channel 11 for this example.
|
 |
10.) Press the [SCAN ] button. This activates the “Reverse Mode” and displays the TX (transmit) frequency. Note that it’s 5 MHz higher than the 443.700 RX freq |
 |
11.) Store the TX (transmit) frequency settings to the same memory channel as before (channel 11 for this example).
|
 |
12.) Press the [SCAN ] button to exit the “Reverse Mode” |
 |
13.) Press [EXIT] |
 |
Set your BaoFeng to “Channel Mode” by pressing the VFO/MR button. When you press it you should hear a voice say “frequency mode” or “channel mode”. Obviously we’re wanting to hear “Channel mode” this time. You can now use the arrow key (Up/Down) to scroll through your channels. Scroll over to Channel 11 (or whichever one you used) and check it out.You can also use the Blue A/B Button to select a different channel for both top and bottom. |
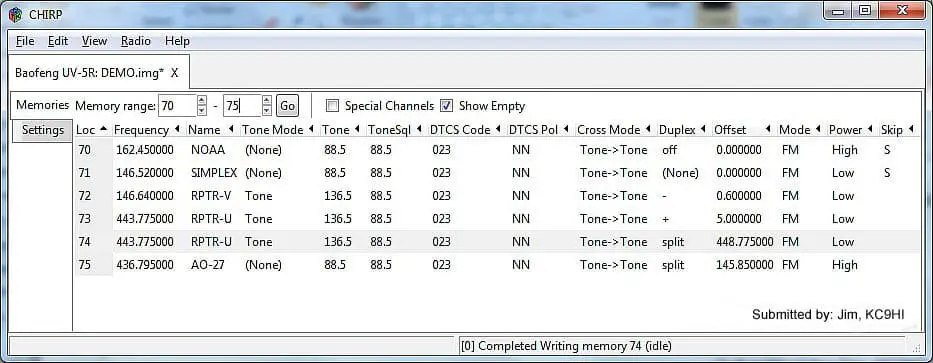
It’s handy to know how to program this via the keypad, but it’s way easier to use software. I don’t use the software that came with my BaoFeng, I use CHIRP. You can set all the settings and save them to your BaoFeng via the USB Programming Cable (this was a really good investment for me). I also did NOT use the drivers on the CD, but went to http://www.miklor.com/COM/UV_Drivers.php and used the process/drivers they have listed. 
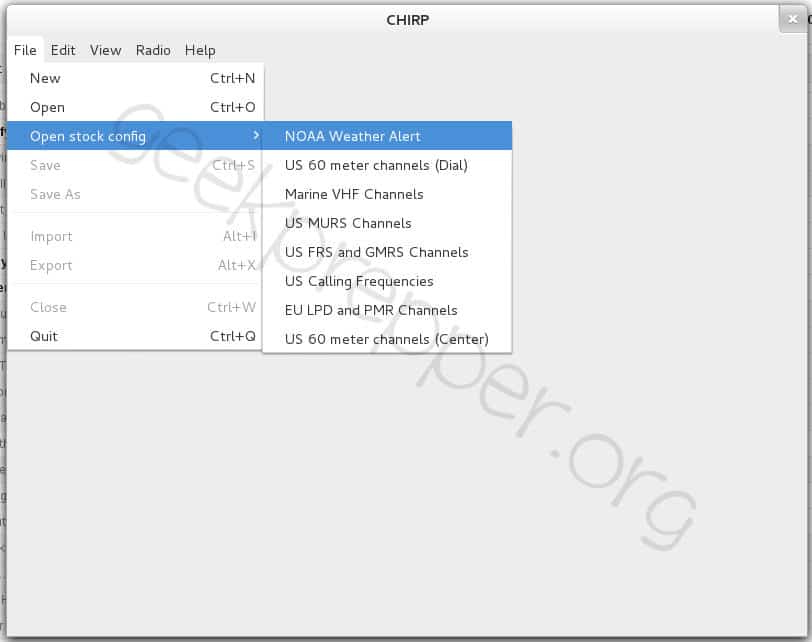
CHIRP also come with “Stock Config” settings. I typically program my local repeaters to the low channels (1,2,3, etc) then add the FRS, GMRS, MURS, Marine Band and NOAA stuff after them. This way I have options. I can talk to HAMs via a repeater, or talk to people using FRS/GMRS walkies talkies.
 If you want to do more than simplex communications over short distances, then you’ll need to use a repeater. I hope this post helped you with Keypad Programming the BaoFeng UV-5R.
See the Original Post at Keypad Programming the BaoFeng UV-5R


