


| Story Views | |
| Now: | |
| Last Hour: | |
| Last 24 Hours: | |
| Total: | |
Kitchen Remodel Announcement: DONE!!!!!

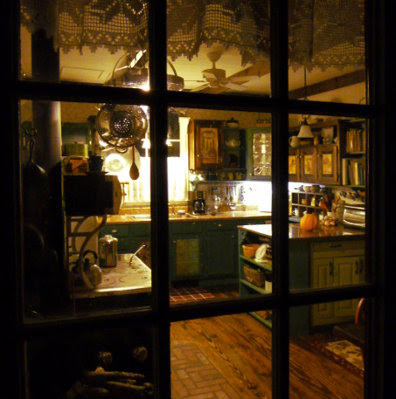 |
| Welcome to my new kitchen! Come on in & I’ll show you around. |
At long last, the kitchen remodeling project is done. As promised, here are before and after photos, lots of them. Because there are so many, they are smaller than I usually put on my blog. You can click or double click for a larger version. With each set of photos, I’ve included pertinent links to my remodeling posts. You’ll find close-ups and project details in these.
The before photos in this post are not of the kitchen as I first saw it. You can see that here. It was the worst kitchen I’d ever seen. To make it functional we moved the stove and fridge, and added a cabinet as a peninsula. We lived with that for over two years. Dan was willing to make the kitchen the first project, but I needed to live with the layout and think about what I wanted:
Aug 2009 - Analyzing my kitchen – what I liked, what I didn’t
Jan. 2011 - Proposed floor plan & notes
April 2011 - Working out some details
Oct. 2011 - Designing storage space
Since this is a 92 year old house, you may be curious as to what we left original. The floor plan remains the same; we did not add any square footage (though we thought about it). The tongue and groove boards on the ceiling and inner walls are original. Everything else we added, replaced, or changed.
So. After that long introduction, let’s start our tour with the back door.
 |
| Before. Shot taken Summer 2009 All photos can be enlarged |
 |
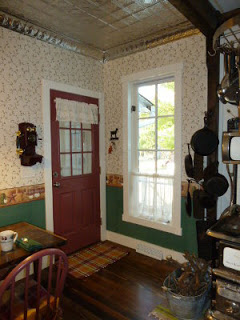
| After |
 |
| Before |
 |
| After |
The tin ceiling was our splurge, but affordable for such a small area. The larger window and windowed back door add much needed light to the room. The door and both windows are energy efficient ones, which really makes a definite difference in the room’s temperature.
The biggest problems here were structural. One was the post in the middle of the room. It was left after a previous owner tore out a load bearing wall to enlarge the original kitchen. The second problem was water damage under the window. This was seen initially in the tongue & groove boards in that corner. Further investigation revealed that the rim joist under the window was badly rotted as well. It had to be replaced.
The idea to move the door came about while trying to figure out how to include a dining area in the plan. Once we knew where the wood cook stove would go, there wasn’t enough room in the window corner. Moving the door gave us just enough room for a small table and two chairs. Plus it gives us a straight shot into the kitchen from the back porch door.
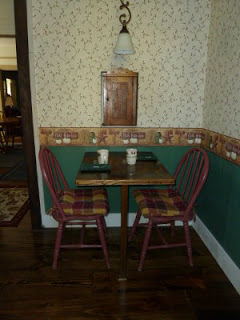 |
| My little dining nook |
The dining area is snug, but allows for good clearance between the corner of the table and the corner of the cookstove. We have enough room for a meal or a coffee break, yet remain out of the traffic pattern to and from the back door. The little cabinet above the table was in my grandmother’s pantry when I was a little girl. I use it now to store salt, pepper, toothpicks, cat snacks, napkin rings, etc.
Close-ups, details, and project photos for all the above can be found in the following posts:
Feb. 2011 - tore out the built-in wall cabinet
Aug. 2011 - milled ceiling beam to replace post
Aug. 2011 - removed floor tiles & replaced post with beam
Aug. 2011 - added support posts for the beam
Sept. 2011 - installed new back door
Sept. 2011 – replaced the rotted rim joist
Sept. 2011 – replaced the window
Sept. 2011 – insulated the outer walls
Oct. 2011 – new window meant new siding & painting
Dec. 2011 – wallpapered the dining nook
Jan. 2012 – installed the tin ceiling
Jan. 2012 – alcove lighting, phone jack, painted back door
Oct. 2012 – started on the dining table and chairs
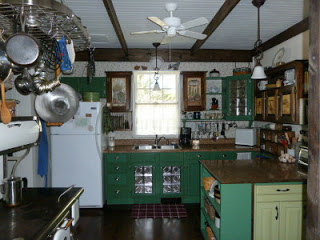
Moving to our right…
 |
| Before |
 |
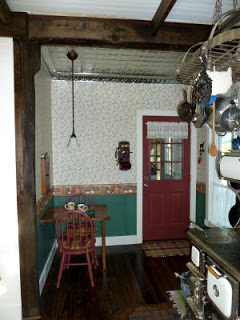
| 2 years later. I know it still looks crookedy, but that’s my camera! |
Originally, we were going to put the wood cookstove where the back door now is. This is a much better location because heat can radiate into the dining room. The ceiling fan helps with that. The stove also keeps the bathroom behind it nicely warm. The pot rack with light is very handy. Because the kitchen floor dipped and sloped so badly, more structural repair was needed before we could install the wood cookstove.
Dec. 2011 – making a level, noncombustible base for the cookstove
Jan. 2012 – wood cookstove chimney installation
Jan. 2012 – installed pot rack (among other things)
March 2012 – problems with the original kitchen floor
March 2012 – preparing the old floor for the new floor
March 2012 – installing the plank floor
April 2012 – staining the new floor
April 2012 - applying the polyurethane
April 2012 - new floor finished
June 2012 - cast iron pot rack (& other odds & ends)
If you’re wondering if I cook with wood all year long, the answer is no. The cookstove is used only during cold weather for heat, as well as cooking. My summer cooking and canning are done on my back porch, which also serves as my laundry room….
 |
| My summer-canning kitchen & laundry room. It was originally set up as my remodeler’s temporary kitchen. |
If this sounds inconvenient, it really isn’t. My kitchen, dining nook, and back porch together total 266 square feet, which is smaller than today’s average American kitchen (said to be 300 sq. ft.) Being able to keep the heat and humidity (especially from canning) out of the house in summertime is well worth it. I have everything out here that I need for summer cooking, canning, and cheese making. The washing machine lid makes an acceptable workspace and the utility sink is handy.
Moving again to our right…
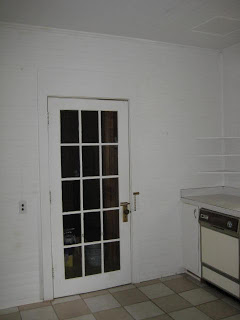 |
| The French door opened to “the addition“ |
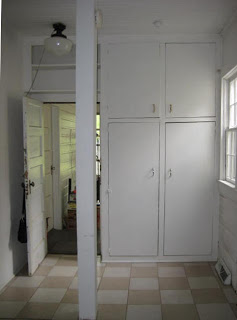
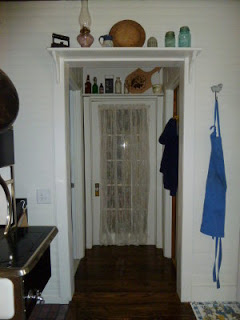 |
| Pantry door was moved back into the hallway |
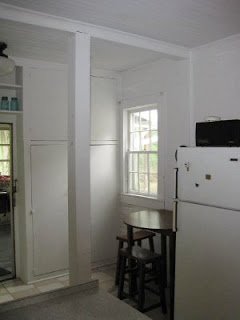
The original kitchen was 11.5 by 11.5 feet. At some point in time, someone built on a 12 by 14 foot addition (photos here). It contained a small pantry, bathroom (before and after photos of that here), and office/study. The French door was installed then. We converted the tiny pantry into a utility room, and the study into a new pantry.
The French door was in the way unless closed. Because there is no ductwork to the bathroom however, the door had to be left open to heat and cool the room. We considered removing the door altogether, but I wanted to keep the pantry unheated. We decided to move the French door farther back into the hallway, as the pantry door. That left the utility room and bathroom more easily accessible. To tie the hallway into the kitchen, we gave it the same wide plank flooring.
Nov. 2011 – relocating the pantry door
May 2012 – added shelf above the door
Next….
 |
| Kitchen corner before |
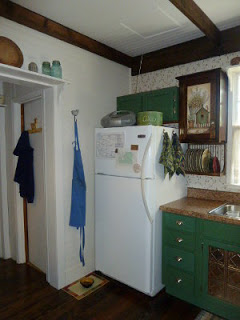 |
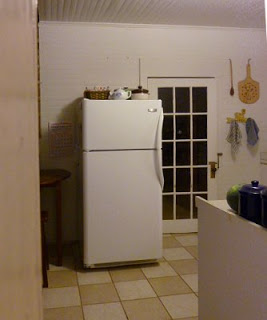
| Kitchen corner after |
This is a much more convenient place for the fridge. I allowed enough counter space to set things going in and out of it. And do you see the framed out square in the ceiling above? That was a stove pipe hole, so we know that this corner was where the original cookstove resided. One thing that couldn’t be changed, was the location of Riley’s food bowl. He was very particular about that.
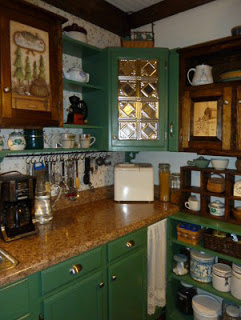
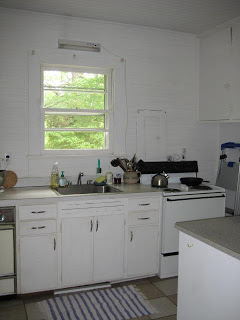 |
| Before |
 |
| What a difference, eh? |
 |
| You can click (or is it double-click) to enlarge |
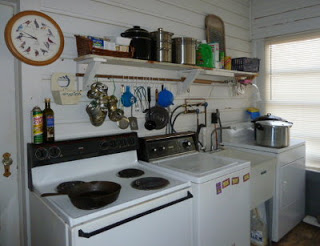
I love everything about the new set-up. Dishes, silverware, glasses, etc., go to the left of the sink, coffee and tea making supplies on the right. I especially love the longer window, with it’s better view. Details for these before and after photos:
Oct. 2011 – moving breaker box & installing new meter
Nov. 2011 - installing the decorative ceiling beams
Nov. 2011 - Hemming my handwoven dishtowels
Dec. 2011 – tearing out the base cabinets, T&G wall, & insulation
Dec. 2011 – New window, insulation, and drywall
Jan. 2012 – Modified the kitchen cabinets to fit the wall
Feb 2012 – leftover tin ceiling panels as cabinet door panels
April 2012 – installing the base cabinets
May 2012 – installing sink & plumbing
June 2012 – trim for the sink window (& a bit about peaches)
June 2012 – making a kitchen utensil rack
Aug. 2012 - Installing the dish rack
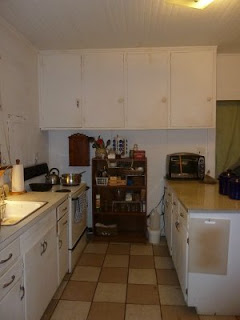 |
| Before |
 |
| After |
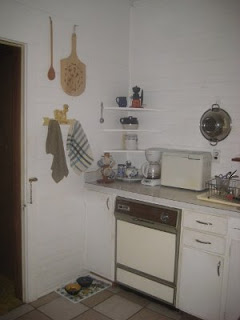
My utensil rack has worked out really well. The corner cabinet has taken some getting used to as storage, because of it’s odd shape.
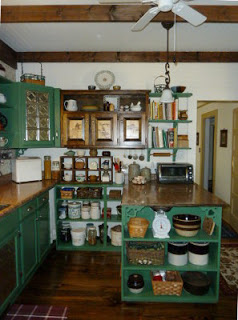
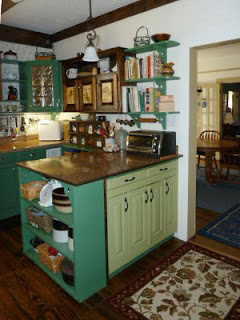
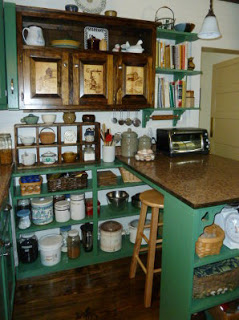 |
| My workstation. Everything is handy. |
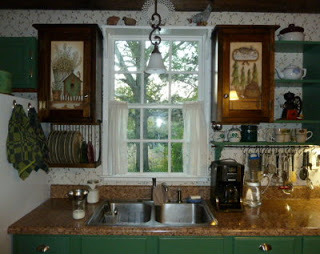
This is my workstation. It’s out of the traffic pattern and everything I might need is close at hand. All my baking supplies are in the wall cabinet, knives in a drawer on the left. Dan woodburned the doors on the wall cabinet for me; for some close-ups of that, click here. The shelves and baskets are very convenient. The stool under the peninsula is a life saver when it comes to preparing foods for canning. My cutting board hangs under there as well. The peninsula is 36 inches wide, so I have plenty of room for every project. Cookbooks are centered on the shelf above, making them convenient from either side.
 |
| From the coming-into-the-kitchen side. |
On the other side of the peninsula, I store everything we need for breakfast or lunch: cereals, chips, crackers, napkins, etc. Also bread baskets, cooling racks and pans for the toaster oven. Very convenient.
Nov. 2011 – Tearing out the old wall cabinets
May 2012 – new kitchen wall cabinets
May 2012 – lining cabinet shelves without shelf paper
May 2012 – building the kitchen peninsula
May 2012 – more shelves for the kitchen
June 2012 – lightening and painting trims
June 2012 – adding the pull-out spice rack
And the last set of photos…
 |
| Before |
 |
| After |
Jan. 2012 – new inset for key holder door
I know that was a ton of photos (I admit I was tempted to add lots of detail close-ups but refrained!) Also a lot of links (lots of close-ups of details there). I won’t pretend that our remodel could pass for being professionally designed and done. I’ll also confess that there are a few spots that still need trimwork. But it’s done, it’s comfortable, it’s functional, it’s welcoming, it’s pretty. In a nutshell, we’re very happy with it.
2012-11-27 10:26:08
Source: http://www.5acresandadream.com/2012/11/kitchen-remodel-announcement-done.html
Source:
