

| Online: | |
| Visits: | |
| Stories: |

| Story Views | |
| Now: | |
| Last Hour: | |
| Last 24 Hours: | |
| Total: | |
DIY Bat House

Why would anyone want to build a bat house? Because bats are the primary predator of those annoying, flying nighttime insects like mosquitoes, moths and beetles. One bat can eat thousands of insects in one evening! And if you build a bat house for them, they will stay out of your chimneys, rafters and attics. Build your very own bat house for spring!
Step 1: Gather the required materials and tools.
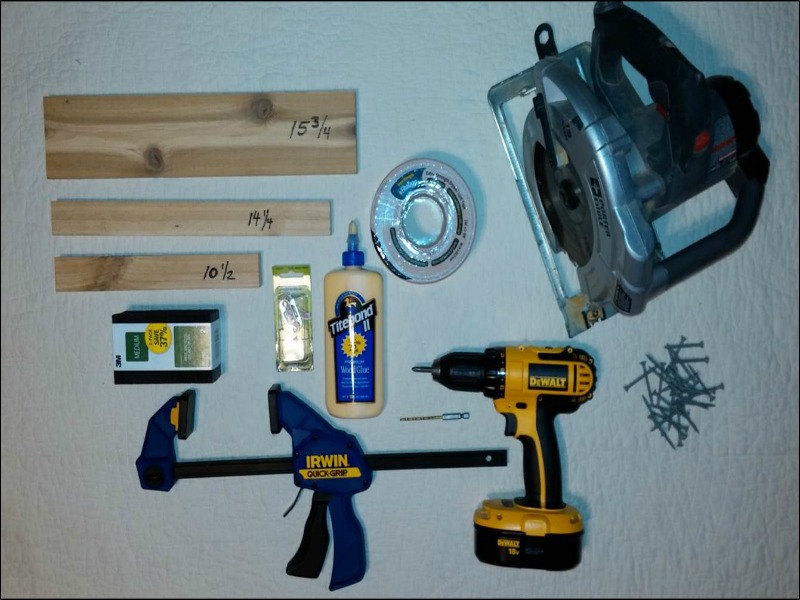
– Six 1” x 4” cedar boards 15 3/4 inches long
– Four 1” x 2” cedar boards 14 1/4 inches long
– Two 1” x 2” cedar boards 10 1/2 inches long
– Two count package of keyhole hangers with screws (1/2” wide x 1 1/2” long)
– Medium grit sanding blocks
– One roll 2 3/8” self-adhesive drywall tape
– Wood glue
– 2” deck screws
Tools:
– Power drill with 1/8” drill bit and Phillips-head bit
– Circular saw
– 12” clamps
A few quick notes about lumber terminology:
 Home centers and lumber yards typically sell lumber identified by “nominal” dimensions. These are the dimensions before the mill surfaced and planed the boards. As a result, the actual dimensions are smaller than the nominal dimensions.
The two sizes of lumber used for this project were 1” x 4” boards (actual dimensions 3/4” x 3 1/2”) and 1” x 2” boards (actual dimensions 3/4” x 1 1/2”).
Each board has 2 long edges, 2 short edges, a front side, and a back side. Lumber is sold either unsurfaced or with 1 or more sides and/or edges surfaced (smooth sanded).
The lumber used for this project had 1 side (the front side) and the two long edges surfaced. The back side and the short edges were unsurfaced.
Step 2: Prepare the front and back panels.
 Place 3 of the 15 3/4 inch 1” x 4” cedar boards side-by-side with the front sides down and the long edges touching. Place a bead of wood glue on each of the long edges of the center board and join the outside boards to the center board. This will result in a board measuring 15 3/4” x 10 1/2”.
On the back (unsurfaced) side of the boards, place a bead of glue along each of the seams you just glued.
Place a strip of the mesh drywall tape along the length of each of the seams (self-adhesive side toward the board) excluding the last 2 inches. Secure the clamps to the two exposed, outer long edges of the boards and allow the glue to set for about an hour.
Repeat this same process with the remaining three 15 3/4 inch 1” x 4” cedar boards.
When the glue sets, these two 15 3/4” x 10 1/2” boards will be the front and back of the bat house.
The unsurfaced sides of the panels and the drywall tape provide an easy surface for the bats to grasp with their feet.
Step 3: Attach the top to the front panel.
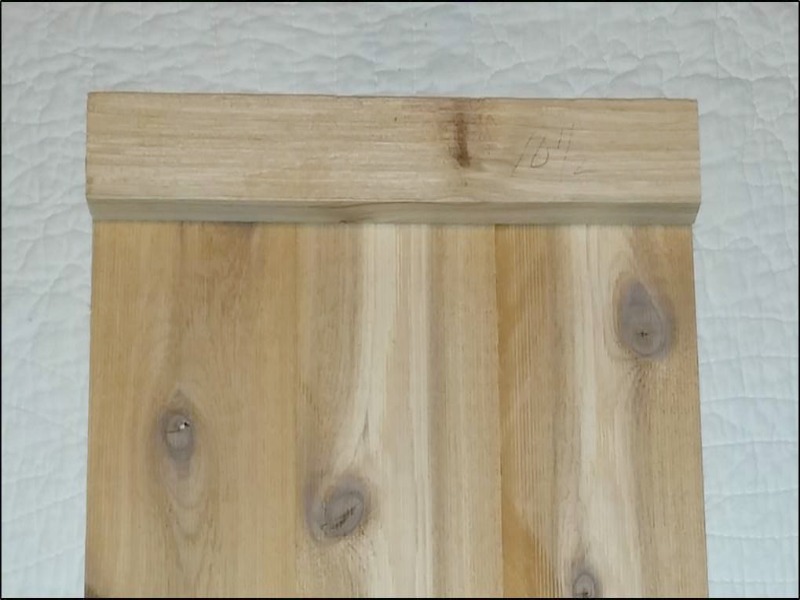 Select one of the 15 3/4” x 10 1/2” boards you made in step two to use as the front panel of the bat house. With the clamps removed, place the front panel on your work bench with the unsurfaced side up. Place a bead of glue on the front side of one of the 10 1/2 inch long 1” x 2” boards.
Place the 10 1/2” board on the unsurfaced side of the front panel (glue side down and aligned with one of the 10 1/2” edges of the front panel).
 Repeat this process with the second 10 1/2 inch long 1” x 2” board, gluing it to the exposed side (back side) of the first 10 1/2 inch board (stacking the two 10 1/2 inch boards on top of each other). This will be the top of the bat house.
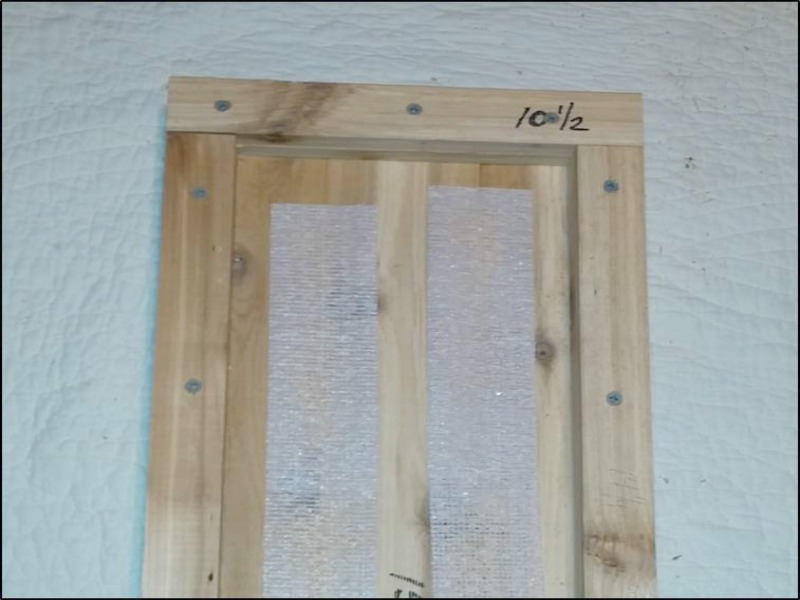
Step 4: Attach the walls to the front panel.
 Place a bead of glue on the front side of one of the 14 1/4 inch long 1” x 2” boards. Place the 14 1/4 inch board on the unsurfaced side of the front panel (glue side down and aligned with one of the long edges of the front panel).
Repeat this process with another 14 1/4 inch long 1” x 2” board, gluing it to the exposed side (back side) of the first 14 1/4 inch board (stacking the two 14 1/4 inch boards on top of each other). This will be one side wall of the bat house.
Repeat this process with the remaining two 14 1/4 inch long 1” x 2” boards, aligning them with the other long edge of the front panel. This will be the other side wall of the bat house.
With the 1/8” drill bit, drill 3 or 4 evenly spaced pilot holes in the exposed back side of the 10 1/2 inch board and the 14 1/4 inch boards forming the top and side walls of the bat house. Be careful to keep these pilot holes shallow (do not drill all the way through the surfaced side of the front panel).
Insert a 2” deck screw into each pilot hole to help reinforce the attachment of the top and side walls to the front panel (do not drive the deck screws all the way through the surfaced side of the front panel).
At this point, you should have a “U” shaped border securely mounted around 3 of the 4 edges of the front panel. Inside the U shaped border are the two strips of drywall tape.
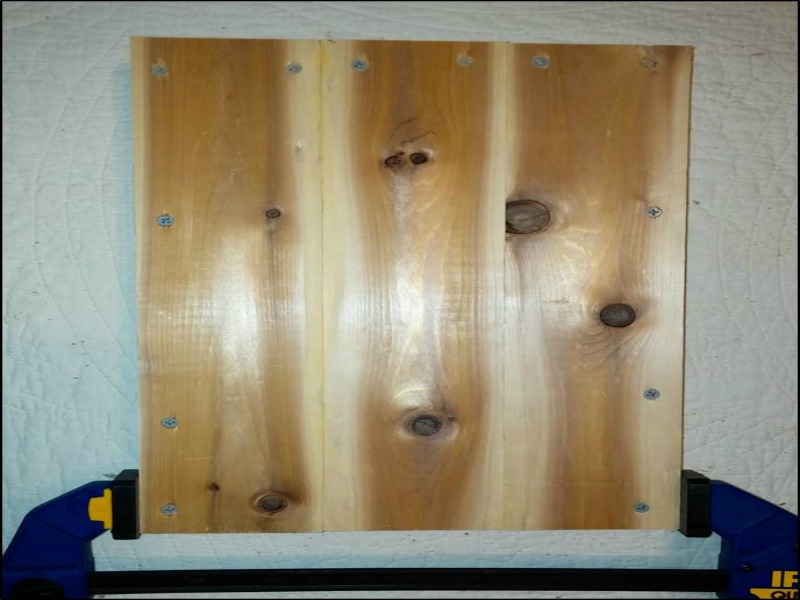
Step 5: Attach the back panel to the bat house.
Place a bead of glue on the exposed back side of the 10 1/2 inch board (top) and each of the 14 1/4 inch boards (side walls) in which you inserted the 2” deck screws in step 4. With the unsurfaced side down, carefully place the remaining 15 3/4” x 10 1/2” board you made in step 2 (the back panel) in place on the top and side walls.
(You can use one of the clamps to help keep the back panel aligned with rest of the bat house, if you wish.)
Being careful not to hit the deck screws you inserted in step 4, drill 3 or 4 pilot holes in the exposed side of the back panel. Align the pilot holes with the top and side walls.
Insert a 2” deck screw into each pilot hole to help reinforce the attachment of the back panel to the top and side walls of the bat house.
Step 6: Attach the hanging hardware.
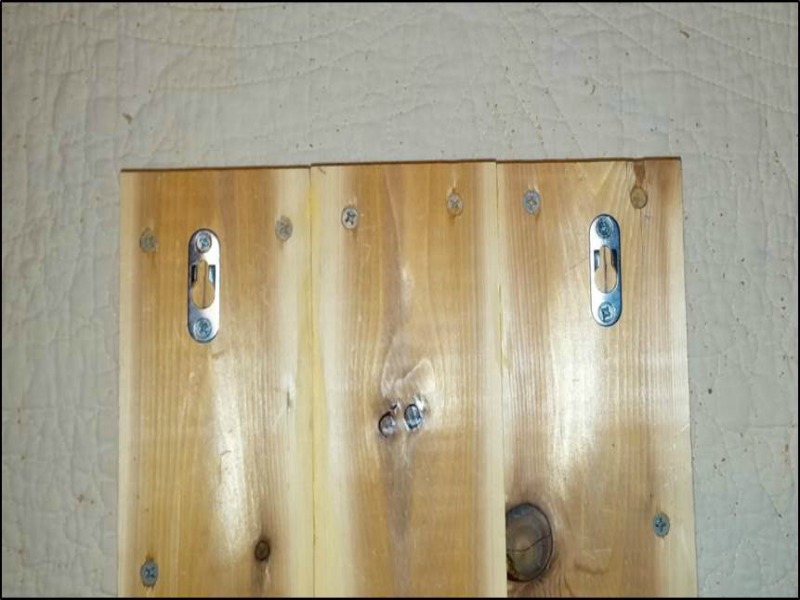 Using the screws included with the set of keyhole hangers, install each keyhole hanger to the back panel about 1 inch from the top edge. Be sure to install both keyhole hangers the same distance from the top of the bat house.
Note: The keyhole hangers pictured here are one of many possible ways to hang the bat house. Depending on where you decide to place your bat house, you may want to go with different hanging hardware.
Step 7: Sand the top of the bat house.
Using the sanding blocks, sand the top of the bat house. Lightly sand the back part of the top. Slowly increase the amount of sanding as you gradually work your way from the back of the top toward the front of the top.
This will result in a smooth top with a slight downhill pitch from the back to the front, which will allow rain water to easily run off the bat house.
(Note: It is not necessary for the pitch of the top to be very steep. A slight pitch is enough to prevent rain water from collecting.)
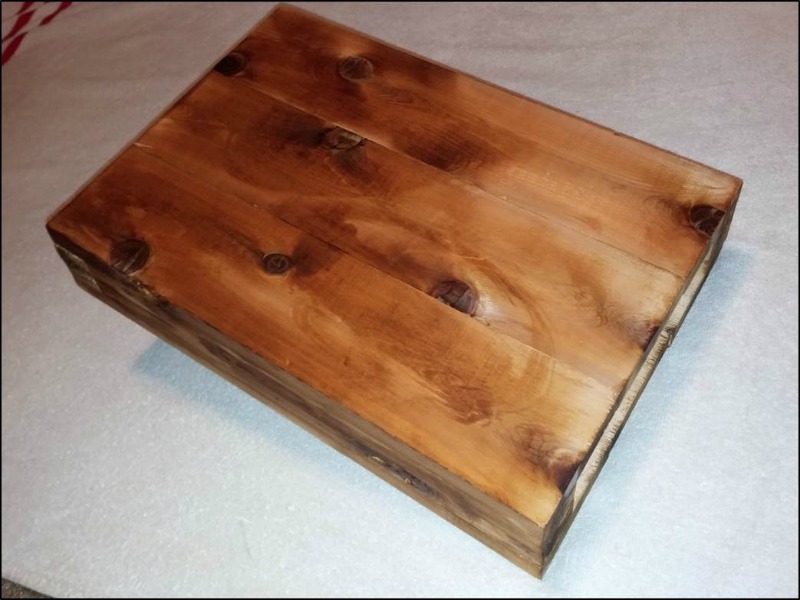 At this point, the bat house is essentially finished. If you wish, you can add a stain or some other wood treatment to the exterior of the bat house. However, it isn’t necessary as the cedar is naturally rot resistant.
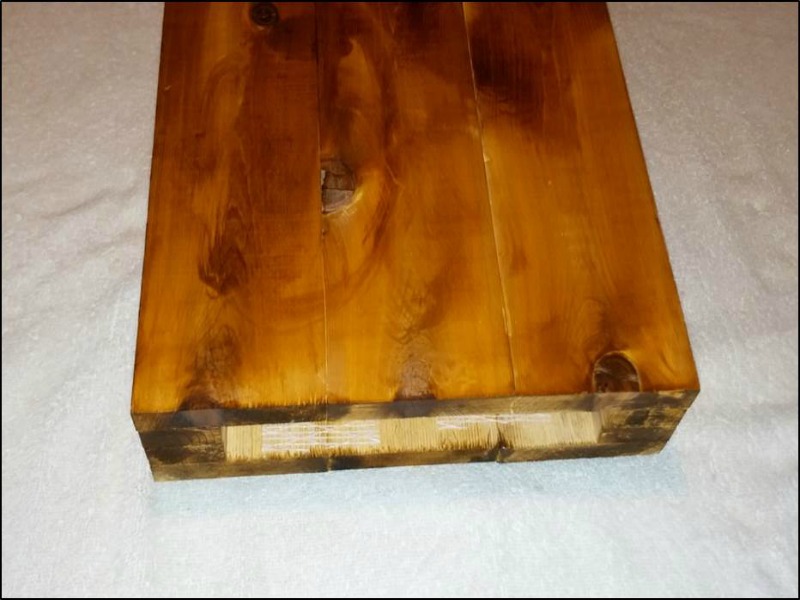 The finished product is a cozy wooden box with a narrow interior space in which the bats will live. Unlike bird houses, bats prefer a dark, cozy space with the entrance to the bat house on the bottom. This gives the bats a nice dry, cave-like atmosphere.
Step 8: Mount the bat house.
Depending on who you ask or what web pages you consult, there are different thoughts out there as to the best locations and methods for mounting a bat house. In general, most experts recommend mounting bat houses with the bottom opening at least 12 to 15 feet off the ground and placing them in an area away from street or house lights. (Bats prefer to sleep during the day and go out in search of mosquitoes and other food at night. If you place your bat house too close to a street or house light, the bat house will be less appealing to its intended occupants.)
Some people prefer to mount bat houses to the sides of their homes, usually under one of the eaves near the roof line. Personally, I prefer to attach bat houses to a tall T-shaped pole and mount the pole in a darker part of the back yard about 25 feet from my home. I prefer this approach for two reasons. First, my kids are easily frightened by bats moving around at night and placing the bat house in the back yard tends to keep the bats somewhat out of sight. Second, having the bat house in the back yard (as opposed to hanging on the side of my home) tends to make it less likely that the bats will eventually try to find their way into my attic.
NOTE: You may wish to change the dimensions and make your bat house bigger or smaller than the one described here. The materials required to build the bat house shown above cost about $25.
About the author:
James Hammond is a disabled veteran and has done landscaping and home renovation projects for over 25 years.
The post DIY Bat House appeared first on Mike's Backyard Nursery.
Source: http://mikesbackyardnursery.com/2015/02/diy-bat-house/
