

| Online: | |
| Visits: | |
| Stories: |

| Story Views | |
| Now: | |
| Last Hour: | |
| Last 24 Hours: | |
| Total: | |
How to Make Your Own Awesome Potting Soil.

Potting Soil has to be the most confusing thing ever!

Mike’s Dagwood Sandwich Potting Soil Ingredients System.
Really it is. You look around on the Internet and you find recipe after recipe after recipe for potting soil. And they vary a lot and for the most part they are very different.
The worst thing about all this variation?
Very few of these recipes even begin to resemble the potting soil recipes that professional growers use. I’m talking about potting soil that is used for growing plants in containers.
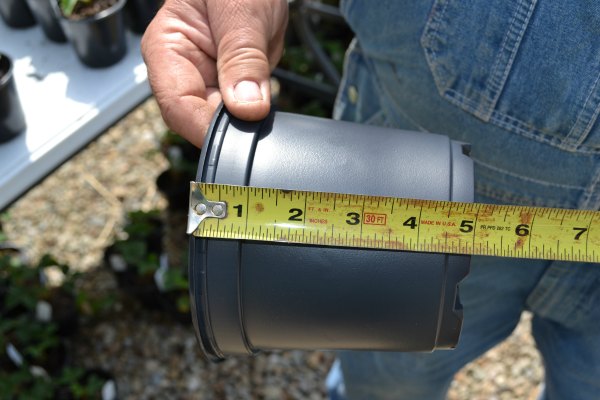
Especially containers this size or larger. If you are growing seeds or small plugs in a greenhouse then you’ll be using a mix that contains both peat and perlite, a lot of perlite. The peat holds moisture, the perlite allows the mix to drain. Neither of those components have even a trace of nutrition in them. Okay for a greenhouse setting where the plants are being fed through a means of liquid fertilizer and foliar feeding.
I should point out that in my nursery I don’t have a greenhouse, I don’t need a greenhouse and I most certainly don’t want a greenhouse. Greenhouses really making growing complicated. I like to keep things simple. All of my plants, all of my cuttings, spend the winter outside in the bitter cold Ohio weather. You need to know that. Plants are tougher than you think.
Over the years I’ve written a lot about the potting soil mix or mixes that I use and in that time my potting soil recipe or mixes have changed. But the one thing that has not changed is that I still am not using any peat in my potting mix and I am still using a great deal of bark mulch. I do not use any perlite in my potting soil mix because, I don’t need it and trying to add perlite which is lighter than a feather is truly an exercise in frustration when mixing potting soil outside as I do.
The Dagwood Sandwich Method of Making Potting Soil.
Back in the day when I started my very first backyard nursery I did not have any machines so I had to find ways to make and mix my own potting soil without any fancy equipment. I devised what I call the dagwood sandwich method.
Actually I had a pretty smooth setup because I had three compost bins at the back of my property and right in front of those I built my potting soil pile. I used a three bin composting method that involved never turning the compost piles. I’d fill one bin, then I’d fill the second bin, then I’d fill the third bin. When the third bin was completely full I’d use a rototiller to loosen the material in the bin and shovel the material out of the bin right on to my potting soil pile which was just a few feet away.
Even if everything in the bin was not completely broken down I’d still empty the bin. The compost could finish “cooking” in my potting soil pile. This is My Three Bin, No Turn Composting System. Of course when we sold the house and moved, that system stayed with the house.
My Potting Soil Ingredients Back Then.
My dagwood potting soil pile consisted of;
- I’d start by buying three to six cubic yards of shredded hardwood bark mulch and I’d have to wheelbarrow that from my truck to the my potting area. I’d dump the hardwood bark mulch into a low, flat pile.
- Then I’d buy three cubic yards of a commercially created compost. Commercial compost can vary a lot depending on where it’s made and sold. And yes, it’s not unusual to find all kinds of foreign objects in it like shredded plastic bags and stuff. Using a 2 by 12 board for a ramp I’d wheelbarrow the compost up on top of my pile of hardwood bark mulch.
- Then I’d I buy a couple of yards of pea gravel and do the same. Using the ramp, it too got wheelbarrowed up on top of my low flat pile. I kept the pile low and flat most of the year because I wanted everything in the pile to get good and wet from snow and rain so the hardwood bark mulch would break down.
The compost held a lot of micro-nutrients that would help break down the hardwood bark mulch.
The Million Dollar Secret to Keeping a Good, Fresh Supply of Usable Potting Soil!
Never let the pile run out. Ideally never use more than half of the pile.
Why?
Because you need that well rotted, broken down organic material to help the fresh hardwood bark that you are adding to the pile to break down faster. So as soon as I was done potting in the spring I’d add more layers to my dagwood sandwich potting soil pile.
Mike! How in World Can You Pot with this Dagwood Sandwich Pile of “Stuff”?
Sorry, I left that part out. I’ll explain that in a second. But first I have to mention that I am also the “Inventor of the Legless Potting Bench”. Yep! A potting bench with no legs! Keep in mind, back then I was “machineless”, that means I had no machines. So I made a potting bench with no legs so I could rest one end of my “legless potting bench” on my potting soil pile, then I’d prop up the other end with a saw horse or usually three concrete blocks.
Why did I do this?
Since I had no machines it was just me and a shovel to load that potting bench with soil so I wanted the bench as close to the soil pile as possible. And you can’t get any closer than having part of the bench resting on the pile. On this page you can see my “World Famous Legless Potting Bench” and how it was all set up.
Okay, so now I’ve got this all set up, but the potting soil pile is not potting soil at all, it’s layers of different material and there is no way in the world that I was going to hand mix that huge pile of “stuff”. So instead of mixing the entire pile I got out the only machine that I owned at the time which was a front tine rototiller. I used the tiller to mix just one corner of the pile. It worked perfectly! I’d mix just enough to fill the potting bench once or twice. Once that amount was used up I’d mix some more.
Years later I bought one of those little Mantis Tillers and that little tiny thing was awesome! It was so light it would literally climb right up the pile then mix the soil on the way down. It worked better than my 8 horse front tine tiller because using the bigger tiller was work. It was heavy and would literally get “stuck” in the pile and I’d have to pull it out. The Mantis was so light it couldn’t get stuck. In the video on this page, I’m using The Mantis Tiller to turn a compost pile. You can see how it climbs and mixes.
Years later, just for you, I made a movie about how to make “A Legless Potting Bench”.
My Potting Soil Recipe Keeps Changing.
That doesn’t mean that the old recipe is no good. Nothing could be further from the truth. But what happened is When I Started My New Nursery a Few Years Ago (I’m really proud of this page), I had more room, I bought a frontend loader and I could store or stock pile even more potting soil. This video is really good, it’s all about potting soil. Be sure to watch it.
Can I Use “Free Mulch” from the tree trimming crew?
No you can’t and in this potting soil video I show you the difference and explain why tree trimmer mulch is no good for potting soil.

Yep! After all these years still using the same potting bench design.

We actually use two of these benches. One for short potters and one for taller potters.
I had such a huge pile of potting soil once it started decomposing it really started to break down fast. Too fast really. I kept adding more fresh hardwood bark to the pile, but knowing that all of the growers around here grow in pine bark mulch I decided to give that a try.
We don’t have pine bark mulch here in Ohio, it has to be trucked in from North Carolina, not exactly a short trip. But it works so well the big growers buy tens of thousands of yards of it each year.
So what I did is I bought a semi trailer load of fresh pine bark mulch. They haul 100 cubic yards in those trucks. The trailers don’t dump, they are not dump trailers. Instead they have a walking floor that literally moves the mulch out of the truck like a conveyor, but it’s not a conveyor. Incredible invention! Dump trailers are dangerous because they go so high in the air and way too often tip over when trying to dump mulch because mulch doesn’t slide as easily as sand or stone.
By the time all of this took place I probably still had about 50 cubic yards of my decomposing hardwood bark mix left then I acquired 100 cubic yards of fresh pine bark mulch. I mixed them together with the tractor of course and all I can say is wow! My plants grew like crazy in this new mix.

Potting soil made with pine bark mulch.
You can see the pine bark pieces in this photo.
The pine bark mulch added plenty of aeration to the mix and that’s important. The roots of your plants have to be able to breath. The decomposed hardwood bark gave the mix the ability to hold just the right amount of moisture and added some nutrition to the mix as well. Of course plants grown in containers have to be fertilized with a “Slow Release Fertilizer”. You Can Not Use Garden Fertilizer on Container Grown Plants! It Will Kill them Overnight!
Like I said, over the years I’ve written a lot on the subject of potting soil ingredients and I urge you to study all that I’ve written because even though what I do has evolved, it’s all very, very relevant.
This is one of the first things that I wrote about potting soil.
This is an article about potting soil and bed building soil.
Soil used for beds, growing plants in the ground is different. It doesn’t have to be as precisely controlled and calculated like potting soil does.
Last year, because I had a huge pile of well decomposed potting soil to add to the pine bark that I was buying, I bought “fresh” pine bark. It worked great.
But this year I want to stock up on pine bark but I don’t really have anything to mix with it just yet, unless I just start adding it to the potting soil pile that I have, I am ordering 100 cubic yards of “aged pine bark” now, just to stay ahead of the game.
Yeah, I know. It all sounds so complicated. And I know that you can’t buy 50 yards of this or 100 yards of that. It’s not. Start with the basics like I did way back in the beginning and just mix up a pile of bark mulch and compost. If you don’t have hardwood bark in your area, look for pine bark. Even rice hulls. Some growers use rice hulls.
Just keep in mind, the plans get most of their nutrition from the slow release fertilizer, but the potting soil has to be able to drain well and breath. That’s why I added pine bark to the mix that I had. Once it really started decomposing, it lost it’s ability to breath and drain well.
But that was just a product of my having huge pile that I wasn’t using fast enough. But I never want to use my potting soil so fast that I run out. I always want to have a really aged base that I can add to and use to mix up a new batch.
Questions or comments? Post them below and I should see them.
Source: http://mikesbackyardnursery.com/2015/10/how-to-make-your-own-awesome-potting-soil/
